How to Choose a Vibratory Finishing Machine for Metal Parts: Bowl, Tub, Capacity, and Process Guide
May 21 , 2026
Equipment Selection Guide
How to Choose a Vibratory Finishing Machine for Metal Parts: Bowl, Tub, Capacity, and Process Guide
The right vibratory finishing machine is determined by the parts and the required production result—not by chamber volume alone. This guide explains how to compare bowl and tub machines, estimate practical capacity, match media and process settings, and prepare the information needed for a reliable equipment recommendation.
A machine that looks large enough on a specification sheet can still be unsuitable in production. Long parts may not circulate correctly in a round bowl. Thin aluminum components may dent when the part load is too high. Small media can lodge in holes, while an undersized separation screen can slow every batch. These issues affect finish consistency, labor, cycle time, and total operating cost.
A practical selection process starts with the workpiece: material, dimensions, geometry, starting surface, target finish, batch quantity, and production rate. Only after these factors are clear should you select the machine format, chamber volume, media, compound system, separation method, and drying equipment.
Quick answer: Choose a vibratory bowl for general-purpose batch finishing, compact parts, and convenient media separation. Choose a vibratory tub for long, oversized, heavy, or high-value parts that do not fit or circulate safely in a bowl. Select capacity from usable process volume and tested part loading—not from the machine's nominal liters alone.
Start with the Part and the Required Finish
Before comparing machine models, document the following six inputs. They determine whether a process is technically viable and whether it can meet production demand.
Material: steel, stainless steel, aluminum, brass, zinc alloy, titanium, or another material.
Part geometry: maximum length, width, thickness, weight, holes, slots, threads, deep recesses, and features that may interlock.
Starting condition: sharp burrs, machining lines, casting scale, oxidation, oil, or an already smooth surface.
Target result: deburring, edge radiusing, cleaning, smoothing, polishing, burnishing, or preparation for coating.
Production demand: pieces per batch, kilograms per shift, available cycle time, and number of shifts.
Quality limits: permitted dimensional change, target roughness or appearance, and sensitivity to scratches, dents, distortion, or part-on-part contact.
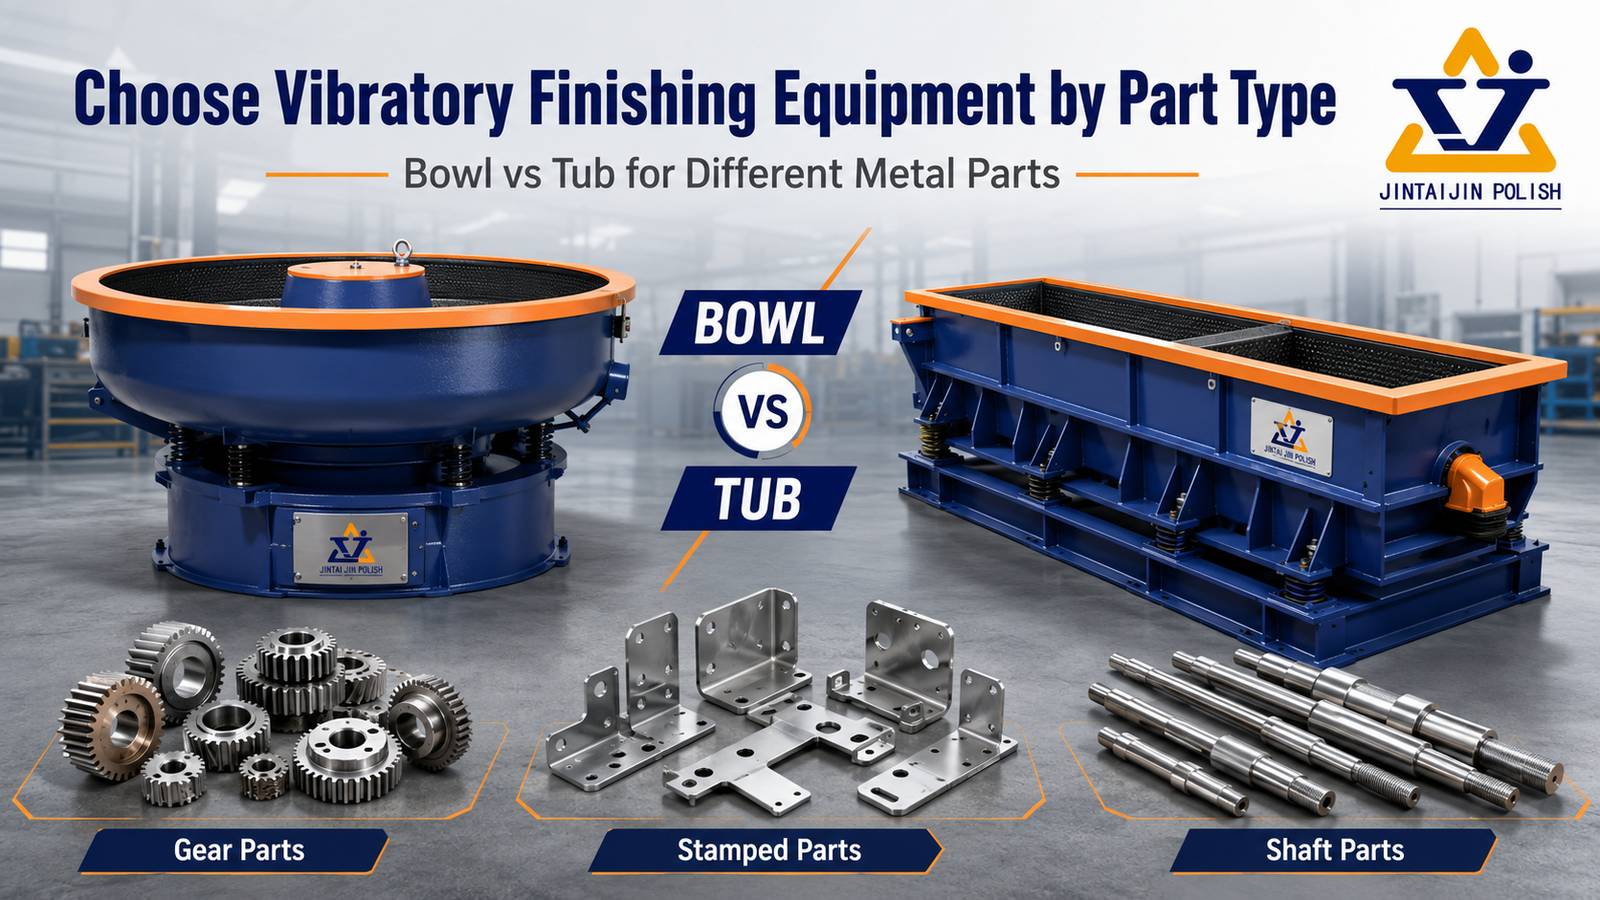
Vibratory Bowl vs Tub: Which Machine Fits Your Parts?
Both machines use vibration to move parts, media, water, and compound through the working chamber. The chamber geometry changes how the load circulates and what workpieces can be processed safely.
Vibratory bowl vs tub: compare part shape, media flow, separation, and typical applications.
Selection Factor
Vibratory Bowl
Vibratory Tub
Best part profile
Compact small and medium parts that circulate freely
Long, large, heavy, irregular, or high-value components
Load movement
Continuous circulation around an annular chamber
Controlled movement along a straight trough
Part protection
Media cushioning and correct loading reduce contact
Optional compartments can isolate individual parts
Separation
Often available with an integrated separation deck
Commonly manual, external, or application-specific
Typical decision trigger
Throughput, automation, and repeatable batch handling
Part length, chamber clearance, and damage prevention
Choose a bowl when:
The parts are short enough to circulate without bridging or entangling.
You need a flexible machine for several part families and processes.
Integrated part-media separation can reduce handling time.
Batch consistency and straightforward loading and unloading are priorities.
Choose a tub when:
The longest part does not fit safely inside the usable width of a bowl channel.
Parts are long, heavy, delicate, or expensive enough to require controlled positioning.
Dividers are needed to prevent component-to-component contact.
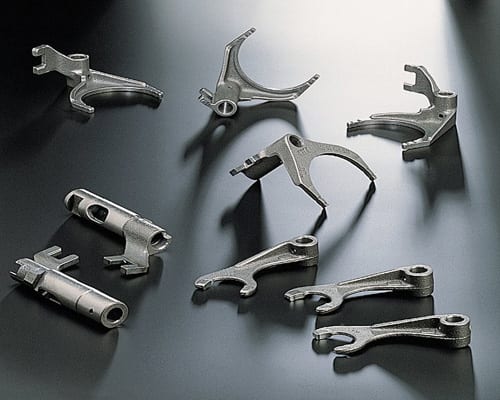
The application involves shafts, blades, housings, castings, or other oversized components.
Explore the available vibratory bowl finishing machines and tub vibrators, but confirm the final model with a part test whenever surface quality or dimensional control is critical.
How to Estimate the Right Machine Capacity
Nominal capacity is the geometric volume of the machine chamber, usually stated in liters. It is not the same as the allowable weight of metal parts per batch. The working load also contains media, parts, water, and free space required for circulation.
Planning formula:
Estimated parts per batch = usable part volume ÷ average displaced volume per part
Use this only as a starting estimate. The safe loading level must be verified with the actual part geometry, media ratio, machine motion, and finish requirement.
A more reliable capacity calculation follows four steps:
Confirm usable chamber volume. Allow enough free space for the mass to circulate; do not treat every nominal liter as usable production volume.
Set a trial media-to-parts ratio. More media generally improves cushioning and separation between parts but reduces the number of parts per batch.
Check bulk displacement. Ten hollow aluminum housings and ten solid steel blocks can occupy similar space while having very different weights. Volume and geometry often matter more than weight alone.
Validate throughput with a timed trial. Include loading, processing, separation, rinsing, drying, and inspection—not just machine cycle time.
Capacity planning should consider usable process volume, media-to-parts ratio, cycle time, and complete shift throughput.
Throughput example
If a validated process handles 120 parts per batch, requires 45 minutes of finishing, and needs another 15 minutes for loading, separation, and handling, the practical output is approximately 120 parts per hour. An eight-hour shift would have a theoretical maximum of 960 parts before allowances for breaks, media maintenance, cleaning, inspection, and changeovers. This calculation is more useful than comparing machine liters alone.
Match the Machine to the Finishing Process
Process Goal
Media Direction
Key Machine Feature
Main Risk to Control
Heavy deburring
Cutting ceramic media matched to burr size
Stable motion and suitable drive power
Excessive edge rounding or media lodging
Smoothing and preparation
Fine ceramic or plastic media
Adjustable intensity and reliable compound flow
Uneven surface or long cycle time
Polishing
Non-aggressive media and compatible compound
Gentle, consistent movement
Part contact marks and residue
Burnishing
Steel media with the correct compound
Load capacity suitable for dense media
Excessive load, staining, or poor drying
For cutting and deburring, compare suitable ceramic media. For softer metals or a gentler cutting action, consider plastic media. Bright burnishing may use steel finishing media. Media shape and dimensions must be checked against every hole, slot, thread, and recess to reduce lodging.
Machine Features That Affect Production
Variable frequency or adjustable intensity: useful when one machine handles different materials, part weights, or finishing stages.
Integrated separation: reduces manual labor when the part and media sizes allow reliable screening.
Compound dosing and water control: supports repeatable cleaning, cutting action, lubrication, and rinsing.
PU lining specification: affects wear resistance, part protection, maintenance, and contamination control.
Sound cover: can improve the working environment where noise control is required.
Chamber dividers: help isolate long or high-value components in a tub.
Downstream drying: should be sized for the wet output of the finishing machine to prevent bottlenecks and water spots.
A Practical Equipment Selection Workflow
Define the acceptance standard. Use a sample, drawing, roughness target, burr limit, or visual standard.
Screen the machine format. Compare the largest part dimensions with the usable chamber geometry and required movement.
Select trial media and compound. Check cutting rate, surface effect, material compatibility, and lodging risk.
Run a small process test. Record time, loading ratio, water and compound settings, part condition, and dimensional change.
Scale the validated batch. Confirm circulation and finish consistency at the intended production load.
Calculate the complete line output. Include separation, rinsing, drying, inspection, rework, and changeover time.
See a Vibratory Finishing Process in Action
The video below shows the movement and operation of a vibratory polishing machine. Actual media, loading, cycle time, and machine settings should be selected for the specific workpiece.
Common Selection Mistakes
Buying by liters alone. Nominal chamber volume does not reveal safe part loading or actual pieces per shift.
Ignoring the longest dimension. A part may fit inside the machine but still fail to circulate correctly.
Using part weight as the only capacity measure. Bulky, hollow, thin, and interlocking parts are governed by displacement and contact risk.
Selecting media without measuring features. The wrong size or shape can lodge in holes, slots, and threads.
Skipping a production-scale test. A small sample may finish well while a full batch develops contact marks or uneven circulation.
Forgetting separation and drying. A fast finishing cycle does not improve output if downstream handling becomes the bottleneck.
Information to Send for an Accurate Recommendation
To shorten the selection process, send the following information with your inquiry:
Part detailsMaterial, dimensions, weight, drawing, and clear photos
Current surfaceBurr size, roughness, scale, machining marks, or contamination
Target resultReference sample, roughness, edge condition, or appearance requirement
Production volumePieces per batch, daily output, shifts, and acceptable cycle time
Special risksThin walls, critical tolerances, holes, threads, interlocking, or contact sensitivity
Automation needsLoading, dosing, separation, rinsing, drying, and line integration
Need help choosing a bowl, tub, media, and practical capacity? Send us your part photos, material, dimensions, target finish, and production quantity. Our finishing team can review the application and recommend a test direction before final machine selection.
Request a finishing process recommendation →
Frequently Asked Questions
Is a larger vibratory finishing machine always more productive?
No. Productivity depends on the safe number of parts per batch, process time, separation, drying, and changeover. An oversized machine running an unstable load can increase media use and operating cost without improving accepted output.
Can long parts be processed in a vibratory bowl?
Only when the part fits the usable channel and circulates without bridging, tangling, or contacting other parts. Long shafts, blades, and profiles are often better evaluated in a tub vibrator.
How much of the chamber should be filled with parts?
There is no universal percentage. The safe part load depends on media-to-parts ratio, part geometry, material sensitivity, desired finish, and machine motion. Use a controlled test to define the production recipe.
Should the machine be selected before the media?
They should be selected as one process system. Media type, size, shape, and density affect cutting action, cushioning, load weight, separation, and the machine power required.
When is a process test necessary?
A test is strongly recommended when parts have critical tolerances, thin walls, complex cavities, high value, strict appearance requirements, or uncertain cycle-time targets. It converts a preliminary equipment estimate into a process-based recommendation.
Related Equipment and Process Resources
Vibratory Finishing Machines
Tub Vibrators
Ceramic Media
Plastic Media
Steel Finishing Media
Finishing Compounds
Choose the Machine from a Validated Process
The best machine is not simply the largest bowl or tub. It is the system that moves your parts safely, reaches the required finish, meets the accepted output per shift, and supports reliable separation and drying.
Send your parts for process evaluation →


 IPv6 network supported


 +86-592-2381506