• Vibratory Finishing vs Barrel Tumbling Which Process Fits Your Parts
    Vibratory Finishing vs Barrel Tumbling Which Process Fits Your Parts May 19 , 2026
    Surface Finishing Vibratory Finishing vs Barrel Tumbling Which Process Fits Your Parts When manufacturers face surface finishing challenges, the root cause is often not what they initially suspect. Parts come back from tumbling with inconsistent results — some look acceptable, others show defects that require rework or scrap. The key to solving these problems is understanding the process variables that actually control the outcome. The finishing process involves multiple interacting variables: media type, machine settings, compound chemistry, water quality, part loading, and post-process handling. When one variable is off, the entire batch can be affected. A systematic diagnostic approach — rather than trial-and-error adjustments — leads to faster solutions and more consistent results. Quick answer: Start by identifying the exact defect pattern visible on your parts. Match the symptom to a likely root cause, check the relevant process variable, and make a targeted adjustment. Avoid the common mistake of extending cycle time or switching to more aggressive media without first diagnosing the underlying issue. The Real Problem: Identify What Is Actually Going Wrong When parts come out with surface defects, the natural reaction is to change something immediately. But without understanding which process variable is causing the problem, those changes often make things worse. The first step is to characterize the defect precisely — is it a scratch, a dent, a discoloration, a dimensional change, or a residue issue? Surface roughness or scratches: media is too aggressive, contaminated, or the cycle time is too long for the current media type. Dents or impact marks: part-on-part contact is too high, or the media-to-part ratio needs adjustment. Discoloration or residue: compound concentration, water quality, or drying process needs attention. Rounded edges or lost detail: over-processing or media shape is too large for part features. Before making process changes, inspect parts under proper lighting to identify the exact defect type. What looks like a polishing problem may actually be a cutting or cleaning issue. Diagnostic Table: Match the Symptom to the Root Cause Symptom Likely Cause What to Check Recommended Adjustment Surface finish is inconsistent across the batch Uneven media distribution or part-on-part contact Media-to-part ratio, machine loading, compound flow Adjust ratio, reduce batch size, or add cushion media to fill the bowl Parts show unexpected scratches or surface marks Contaminated media, wrong media shape, or overly aggressive cycle Check media cleanliness, separation, and storage bins for mixed materials Clean or replace media, test a gentler media shape or smaller size Edges are rounded or functional details are lost Over-processing or media too large for part features Measure critical dimensions before and after test cycles Shorten cycle time, use smaller media, reduce machine speed or amplitude Surface residue or film is visible after drying Dirty compound, poor water quality, or incomplete rinsing Water quality, compound concentration, rinsing and drying sequence Use clean water, refresh compound at proper intervals, improve drying process Brightness varies significantly between parts Mixed surface starting conditions or uneven processing Incoming part surface, batch sorting, media distribution Sort parts by starting condition, run separate batches for different surface states Media and Compound Selection: Match the Process to the Material Choosing the right media is just as important as setting the correct machine parameters. The media type, size, and shape determine how the surface is refined, while the compound chemistry controls cutting action, cleaning, and final brightness. For heavier deburring: ceramic media provides aggressive cutting power suitable for ferrous metals and harder alloys. For softer metals and delicate parts: plastic media offers a cushioned cutting action that protects fine features. For bright finishing: pair fine media with compatible finishing compounds to achieve both the desired roughness and brightness. See the Process in Action Watch how surface finishing equipment processes parts in a real production environment. This video demonstrates the equipment and process discussed in this article: After finishing, inspect parts under proper lighting for surface consistency, edge quality, and overall brightness before moving to the next operation. Build a Controlled Finishing Sequence For best results, structure the process in stages rather than attempting to achieve the final finish in a single long cycle. A staged approach lets you control each variable independently and verify results before moving to the next stage. 1. Pre-Smoothing Use a medium-grade media to remove burrs and reduce machining marks. Keep cycle time moderate and check progress at regular intervals. 2. Final Finish Switch to a finer media for the target surface quality. Reduce machine speed or amplitude if the part geometry requires gentler processing. 3. Separation & Rinse Separate parts from media carefully. If wet processing was used, rinse thoroughly with clean water to remove compound residue. 4. Drying & Inspection Dry parts promptly to prevent water spots. Inspect under both top light and side light before judging the final result. Need to confirm a process before batch production? Send us your part material, photos, dimensions, current surface condition, and target finish. We can help review whether your issue is caused by media, machine settings, compound, water quality, or handling after finishing. Contact our finishing team → Common Mistakes to Avoid Only extending cycle time. Longer time can increase heat, edge rounding, and part-on-part damage if the root cause is media or compound. Switching to more aggressive media immediately. A smaller media size or different shape often solves the problem without risking surface damage. Ignoring media cleanliness. Dirty media, mixed media types, or metal fines in the bowl can scratch parts that should be getting polished. Skipping test cycles. Always run a small sample batch first to confirm the process before committing full production volume. Overloading the machine. Too many parts in one batch can cause impact damage, uneven finishing, and longer cycle times. Judging parts while wet. Water film can hide scratches and residue until drying reveals them. Inspect after drying under proper light. Related Solutions These pages may help you compare suitable machines, media, compounds, and processes: Vibratory Finishing Machine Barrel Finishing Machines Rotary Barrel Tumbling Grinding Finishing Machine Disc Finishing Machines Magnetic Finishing Machines Need Expert Advice for Your Finishing Process? Send us your part material, photos, dimensions, current surface condition, target finish, and batch quantity. Our team can help recommend suitable finishing machines, media, compounds, and a test process direction for your specific application. Request process support →
  • How to Remove Burrs from CNC Aluminum Parts Without Edge Damage
    How to Remove Burrs from CNC Aluminum Parts Without Edge Damage May 19 , 2026
    Aluminum Part Finishing How to Remove Burrs from CNC Aluminum Parts Without Edge Damage When manufacturers face surface finishing challenges, the root cause is often not what they initially suspect. Parts come back from tumbling with inconsistent results — some look acceptable, others show defects that require rework or scrap. The key to solving these problems is understanding the process variables that actually control the outcome. The finishing process involves multiple interacting variables: media type, machine settings, compound chemistry, water quality, part loading, and post-process handling. When one variable is off, the entire batch can be affected. A systematic diagnostic approach — rather than trial-and-error adjustments — leads to faster solutions and more consistent results. Quick answer: Start by identifying the exact defect pattern visible on your parts. Match the symptom to a likely root cause, check the relevant process variable, and make a targeted adjustment. Avoid the common mistake of extending cycle time or switching to more aggressive media without first diagnosing the underlying issue. The Real Problem: Identify What Is Actually Going Wrong When parts come out with surface defects, the natural reaction is to change something immediately. But without understanding which process variable is causing the problem, those changes often make things worse. The first step is to characterize the defect precisely — is it a scratch, a dent, a discoloration, a dimensional change, or a residue issue? Surface roughness or scratches: media is too aggressive, contaminated, or the cycle time is too long for the current media type. Dents or impact marks: part-on-part contact is too high, or the media-to-part ratio needs adjustment. Discoloration or residue: compound concentration, water quality, or drying process needs attention. Rounded edges or lost detail: over-processing or media shape is too large for part features. Before making process changes, inspect parts under proper lighting to identify the exact defect type. What looks like a polishing problem may actually be a cutting or cleaning issue. Diagnostic Table: Match the Symptom to the Root Cause Symptom Likely Cause What to Check Recommended Adjustment Surface finish is inconsistent across the batch Uneven media distribution or part-on-part contact Media-to-part ratio, machine loading, compound flow Adjust ratio, reduce batch size, or add cushion media to fill the bowl Parts show unexpected scratches or surface marks Contaminated media, wrong media shape, or overly aggressive cycle Check media cleanliness, separation, and storage bins for mixed materials Clean or replace media, test a gentler media shape or smaller size Edges are rounded or functional details are lost Over-processing or media too large for part features Measure critical dimensions before and after test cycles Shorten cycle time, use smaller media, reduce machine speed or amplitude Surface residue or film is visible after drying Dirty compound, poor water quality, or incomplete rinsing Water quality, compound concentration, rinsing and drying sequence Use clean water, refresh compound at proper intervals, improve drying process Brightness varies significantly between parts Mixed surface starting conditions or uneven processing Incoming part surface, batch sorting, media distribution Sort parts by starting condition, run separate batches for different surface states Media and Compound Selection: Match the Process to the Material Choosing the right media is just as important as setting the correct machine parameters. The media type, size, and shape determine how the surface is refined, while the compound chemistry controls cutting action, cleaning, and final brightness. For heavier deburring: ceramic media provides aggressive cutting power suitable for ferrous metals and harder alloys. For softer metals and delicate parts: plastic media offers a cushioned cutting action that protects fine features. For bright finishing: pair fine media with compatible finishing compounds to achieve both the desired roughness and brightness. See the Process in Action Watch how surface finishing equipment processes parts in a real production environment. This video demonstrates the equipment and process discussed in this article: After finishing, inspect parts under proper lighting for surface consistency, edge quality, and overall brightness before moving to the next operation. Build a Controlled Finishing Sequence For best results, structure the process in stages rather than attempting to achieve the final finish in a single long cycle. A staged approach lets you control each variable independently and verify results before moving to the next stage. 1. Pre-Smoothing Use a medium-grade media to remove burrs and reduce machining marks. Keep cycle time moderate and check progress at regular intervals. 2. Final Finish Switch to a finer media for the target surface quality. Reduce machine speed or amplitude if the part geometry requires gentler processing. 3. Separation & Rinse Separate parts from media carefully. If wet processing was used, rinse thoroughly with clean water to remove compound residue. 4. Drying & Inspection Dry parts promptly to prevent water spots. Inspect under both top light and side light before judging the final result. Need to confirm a process before batch production? Send us your part material, photos, dimensions, current surface condition, and target finish. We can help review whether your issue is caused by media, machine settings, compound, water quality, or handling after finishing. Contact our finishing team → Common Mistakes to Avoid Only extending cycle time. Longer time can increase heat, edge rounding, and part-on-part damage if the root cause is media or compound. Switching to more aggressive media immediately. A smaller media size or different shape often solves the problem without risking surface damage. Ignoring media cleanliness. Dirty media, mixed media types, or metal fines in the bowl can scratch parts that should be getting polished. Skipping test cycles. Always run a small sample batch first to confirm the process before committing full production volume. Overloading the machine. Too many parts in one batch can cause impact damage, uneven finishing, and longer cycle times. Judging parts while wet. Water film can hide scratches and residue until drying reveals them. Inspect after drying under proper light. Related Solutions These pages may help you compare suitable machines, media, compounds, and processes: Vibratory Finishing Machine Grinding Finishing Machine Disc Finishing Machines Barrel Finishing Machines Tub Vibrators Rotary Barrel Tumbling Need Expert Advice for Your Finishing Process? Send us your part material, photos, dimensions, current surface condition, target finish, and batch quantity. Our team can help recommend suitable finishing machines, media, compounds, and a test process direction for your specific application. Request process support →
  • How to Prevent Tumbling Media from Lodging in Holes Slots and Threads
    How to Prevent Tumbling Media from Lodging in Holes Slots and Threads May 18 , 2026
    Media Selection Guide How to Prevent Tumbling Media from Lodging in Holes Slots and Threads When manufacturers face surface finishing challenges, the root cause is often not what they initially suspect. Parts come back from tumbling with inconsistent results — some look acceptable, others show defects that require rework or scrap. The key to solving these problems is understanding the process variables that actually control the outcome. The finishing process involves multiple interacting variables: media type, machine settings, compound chemistry, water quality, part loading, and post-process handling. When one variable is off, the entire batch can be affected. A systematic diagnostic approach — rather than trial-and-error adjustments — leads to faster solutions and more consistent results. Quick answer: Start by identifying the exact defect pattern visible on your parts. Match the symptom to a likely root cause, check the relevant process variable, and make a targeted adjustment. Avoid the common mistake of extending cycle time or switching to more aggressive media without first diagnosing the underlying issue. The Real Problem: Identify What Is Actually Going Wrong When parts come out with surface defects, the natural reaction is to change something immediately. But without understanding which process variable is causing the problem, those changes often make things worse. The first step is to characterize the defect precisely — is it a scratch, a dent, a discoloration, a dimensional change, or a residue issue? Surface roughness or scratches: media is too aggressive, contaminated, or the cycle time is too long for the current media type. Dents or impact marks: part-on-part contact is too high, or the media-to-part ratio needs adjustment. Discoloration or residue: compound concentration, water quality, or drying process needs attention. Rounded edges or lost detail: over-processing or media shape is too large for part features. Before making process changes, inspect parts under proper lighting to identify the exact defect type. What looks like a polishing problem may actually be a cutting or cleaning issue. Diagnostic Table: Match the Symptom to the Root Cause Symptom Likely Cause What to Check Recommended Adjustment Surface finish is inconsistent across the batch Uneven media distribution or part-on-part contact Media-to-part ratio, machine loading, compound flow Adjust ratio, reduce batch size, or add cushion media to fill the bowl Parts show unexpected scratches or surface marks Contaminated media, wrong media shape, or overly aggressive cycle Check media cleanliness, separation, and storage bins for mixed materials Clean or replace media, test a gentler media shape or smaller size Edges are rounded or functional details are lost Over-processing or media too large for part features Measure critical dimensions before and after test cycles Shorten cycle time, use smaller media, reduce machine speed or amplitude Surface residue or film is visible after drying Dirty compound, poor water quality, or incomplete rinsing Water quality, compound concentration, rinsing and drying sequence Use clean water, refresh compound at proper intervals, improve drying process Brightness varies significantly between parts Mixed surface starting conditions or uneven processing Incoming part surface, batch sorting, media distribution Sort parts by starting condition, run separate batches for different surface states Media and Compound Selection: Match the Process to the Material Choosing the right media is just as important as setting the correct machine parameters. The media type, size, and shape determine how the surface is refined, while the compound chemistry controls cutting action, cleaning, and final brightness. For heavier deburring: ceramic media provides aggressive cutting power suitable for ferrous metals and harder alloys. For softer metals and delicate parts: plastic media offers a cushioned cutting action that protects fine features. For bright finishing: pair fine media with compatible finishing compounds to achieve both the desired roughness and brightness. See the Process in Action Watch how surface finishing equipment processes parts in a real production environment. This video demonstrates the equipment and process discussed in this article: After finishing, inspect parts under proper lighting for surface consistency, edge quality, and overall brightness before moving to the next operation. Build a Controlled Finishing Sequence For best results, structure the process in stages rather than attempting to achieve the final finish in a single long cycle. A staged approach lets you control each variable independently and verify results before moving to the next stage. 1. Pre-Smoothing Use a medium-grade media to remove burrs and reduce machining marks. Keep cycle time moderate and check progress at regular intervals. 2. Final Finish Switch to a finer media for the target surface quality. Reduce machine speed or amplitude if the part geometry requires gentler processing. 3. Separation & Rinse Separate parts from media carefully. If wet processing was used, rinse thoroughly with clean water to remove compound residue. 4. Drying & Inspection Dry parts promptly to prevent water spots. Inspect under both top light and side light before judging the final result. Need to confirm a process before batch production? Send us your part material, photos, dimensions, current surface condition, and target finish. We can help review whether your issue is caused by media, machine settings, compound, water quality, or handling after finishing. Contact our finishing team → Common Mistakes to Avoid Only extending cycle time. Longer time can increase heat, edge rounding, and part-on-part damage if the root cause is media or compound. Switching to more aggressive media immediately. A smaller media size or different shape often solves the problem without risking surface damage. Ignoring media cleanliness. Dirty media, mixed media types, or metal fines in the bowl can scratch parts that should be getting polished. Skipping test cycles. Always run a small sample batch first to confirm the process before committing full production volume. Overloading the machine. Too many parts in one batch can cause impact damage, uneven finishing, and longer cycle times. Judging parts while wet. Water film can hide scratches and residue until drying reveals them. Inspect after drying under proper light. Related Solutions These pages may help you compare suitable machines, media, compounds, and processes: Rotary Barrel Tumbling Ceramic Media Plastic Media Steel Finishing Media Dry Finishing Media Need Expert Advice for Your Finishing Process? Send us your part material, photos, dimensions, current surface condition, target finish, and batch quantity. Our team can help recommend suitable finishing machines, media, compounds, and a test process direction for your specific application. Request process support →
  • Ceramic Media vs Plastic Media How to Choose the Right Tumbling Media
    Ceramic Media vs Plastic Media How to Choose the Right Tumbling Media May 18 , 2026
    Media Selection Guide Ceramic Media vs Plastic Media How to Choose the Right Tumbling Media When manufacturers face surface finishing challenges, the root cause is often not what they initially suspect. Parts come back from tumbling with inconsistent results — some look acceptable, others show defects that require rework or scrap. The key to solving these problems is understanding the process variables that actually control the outcome. The finishing process involves multiple interacting variables: media type, machine settings, compound chemistry, water quality, part loading, and post-process handling. When one variable is off, the entire batch can be affected. A systematic diagnostic approach — rather than trial-and-error adjustments — leads to faster solutions and more consistent results. Quick answer: Start by identifying the exact defect pattern visible on your parts. Match the symptom to a likely root cause, check the relevant process variable, and make a targeted adjustment. Avoid the common mistake of extending cycle time or switching to more aggressive media without first diagnosing the underlying issue. The Real Problem: Identify What Is Actually Going Wrong When parts come out with surface defects, the natural reaction is to change something immediately. But without understanding which process variable is causing the problem, those changes often make things worse. The first step is to characterize the defect precisely — is it a scratch, a dent, a discoloration, a dimensional change, or a residue issue? Surface roughness or scratches: media is too aggressive, contaminated, or the cycle time is too long for the current media type. Dents or impact marks: part-on-part contact is too high, or the media-to-part ratio needs adjustment. Discoloration or residue: compound concentration, water quality, or drying process needs attention. Rounded edges or lost detail: over-processing or media shape is too large for part features. Before making process changes, inspect parts under proper lighting to identify the exact defect type. What looks like a polishing problem may actually be a cutting or cleaning issue. Diagnostic Table: Match the Symptom to the Root Cause Symptom Likely Cause What to Check Recommended Adjustment Surface finish is inconsistent across the batch Uneven media distribution or part-on-part contact Media-to-part ratio, machine loading, compound flow Adjust ratio, reduce batch size, or add cushion media to fill the bowl Parts show unexpected scratches or surface marks Contaminated media, wrong media shape, or overly aggressive cycle Check media cleanliness, separation, and storage bins for mixed materials Clean or replace media, test a gentler media shape or smaller size Edges are rounded or functional details are lost Over-processing or media too large for part features Measure critical dimensions before and after test cycles Shorten cycle time, use smaller media, reduce machine speed or amplitude Surface residue or film is visible after drying Dirty compound, poor water quality, or incomplete rinsing Water quality, compound concentration, rinsing and drying sequence Use clean water, refresh compound at proper intervals, improve drying process Brightness varies significantly between parts Mixed surface starting conditions or uneven processing Incoming part surface, batch sorting, media distribution Sort parts by starting condition, run separate batches for different surface states Media and Compound Selection: Match the Process to the Material Choosing the right media is just as important as setting the correct machine parameters. The media type, size, and shape determine how the surface is refined, while the compound chemistry controls cutting action, cleaning, and final brightness. For heavier deburring: ceramic media provides aggressive cutting power suitable for ferrous metals and harder alloys. For softer metals and delicate parts: plastic media offers a cushioned cutting action that protects fine features. For bright finishing: pair fine media with compatible finishing compounds to achieve both the desired roughness and brightness. See the Process in Action Watch how surface finishing equipment processes parts in a real production environment. This video demonstrates the equipment and process discussed in this article: After finishing, inspect parts under proper lighting for surface consistency, edge quality, and overall brightness before moving to the next operation. Build a Controlled Finishing Sequence For best results, structure the process in stages rather than attempting to achieve the final finish in a single long cycle. A staged approach lets you control each variable independently and verify results before moving to the next stage. 1. Pre-Smoothing Use a medium-grade media to remove burrs and reduce machining marks. Keep cycle time moderate and check progress at regular intervals. 2. Final Finish Switch to a finer media for the target surface quality. Reduce machine speed or amplitude if the part geometry requires gentler processing. 3. Separation & Rinse Separate parts from media carefully. If wet processing was used, rinse thoroughly with clean water to remove compound residue. 4. Drying & Inspection Dry parts promptly to prevent water spots. Inspect under both top light and side light before judging the final result. Need to confirm a process before batch production? Send us your part material, photos, dimensions, current surface condition, and target finish. We can help review whether your issue is caused by media, machine settings, compound, water quality, or handling after finishing. Contact our finishing team → Common Mistakes to Avoid Only extending cycle time. Longer time can increase heat, edge rounding, and part-on-part damage if the root cause is media or compound. Switching to more aggressive media immediately. A smaller media size or different shape often solves the problem without risking surface damage. Ignoring media cleanliness. Dirty media, mixed media types, or metal fines in the bowl can scratch parts that should be getting polished. Skipping test cycles. Always run a small sample batch first to confirm the process before committing full production volume. Overloading the machine. Too many parts in one batch can cause impact damage, uneven finishing, and longer cycle times. Judging parts while wet. Water film can hide scratches and residue until drying reveals them. Inspect after drying under proper light. Related Solutions These pages may help you compare suitable machines, media, compounds, and processes: Ceramic Media Plastic Media Steel Finishing Media Dry Finishing Media Rotary Barrel Tumbling Need Expert Advice for Your Finishing Process? Send us your part material, photos, dimensions, current surface condition, target finish, and batch quantity. Our team can help recommend suitable finishing machines, media, compounds, and a test process direction for your specific application. Request process support →
  • Why Stainless Steel Parts Are Not Bright After Tumbling and How to Improve the Finish
    Why Stainless Steel Parts Are Not Bright After Tumbling and How to Improve the Finish May 18 , 2026
    Why Stainless Steel Parts Are Not Bright After Tumbling and How to Improve the Finish Quick Answer A controlled surface finishing process with the right media selection, proper compound matching, correct machine settings, and clean post-process handling can solve this problem. The key is diagnosing the root cause before adjusting parameters blindly. The Real Problem: Identify What Is Actually Going Wrong When parts come out with defects, the first instinct is often to extend cycle time or switch to a more aggressive media. But these changes can sometimes make the problem worse. Instead, start by understanding exactly what defect pattern you are seeing and what typically causes it. Before finishing, inspect part surfaces for machining marks, burrs, or previous process defects that need controlled removal before the final polish stage. Diagnostic Table: Match the Symptom to the Root Cause Symptom Likely Cause What to Check Recommended Adjustment Surface finish is inconsistent across batch Uneven media distribution or part-on-part contact Media-to-part ratio, machine loading, compound flow Adjust ratio, reduce batch size, or add cushion media Parts show unexpected scratches or marks Contaminated media, wrong media shape, or aggressive cycle Check media cleanliness, separation, and storage bins Clean or replace media, test gentler media shape Edges are rounded or details lost Over-processing or media too large for features Measure critical dimensions before and after test cycles Shorten cycle, use smaller media, reduce machine speed Surface residue or film after drying Dirty compound, poor water quality, or incomplete rinsing Water quality, compound concentration, rinsing and drying steps Use clean water, refresh compound, improve drying process Media and Compound Selection: Match the Process to the Material Choosing the right media is just as important as setting the correct machine parameters. The media type, size, and shape determine how the surface is refined, while the compound chemistry controls cutting action, cleaning, and final brightness. For heavier deburring and surface refinement, ceramic media provides aggressive cutting power suitable for ferrous metals and harder alloys. For softer metals, aluminum, zinc, and delicate parts, plastic media offers a more cushioned cutting action that protects fine features and threads. When paired with compatible finishing compounds, the process can achieve both the desired surface roughness and brightness in a single continuous cycle. After finishing, inspect parts under proper lighting for surface consistency, edge quality, and overall brightness before moving to packaging or assembly. Process Recommendation: Build a Controlled Finishing Sequence For best results, structure the process in stages rather than attempting to achieve the final finish in a single long cycle: Stage 1 — Pre-Smoothing: Use a medium-grade media to remove burrs and reduce machining marks. Keep cycle time moderate and check progress at intervals. Stage 2 — Final Finish: Switch to a finer media or polishing-grade material for the final surface quality. Reduce machine speed or amplitude if needed. Final Step — Separation and Inspection: Separate parts from media carefully. Dry thoroughly if wet processing was used. Inspect under both top light and side light before judging the result. See the Process in Action Watch how surface finishing equipment processes parts in a real production environment: Common Mistakes That Make the Problem Worse Only extending cycle time. Longer time can increase heat, edge rounding, and part-on-part damage if the media or compound is wrong. Switching to more aggressive media immediately. A smaller media size or different shape often solves the problem without risking surface damage. Ignoring media cleanliness. Dirty media, mixed media types, or metal chips in the bowl can scratch parts that should be getting polished. Skipping test cycles. Always run a small sample batch first to confirm the process before committing full production volume. Overloading the machine. Too many parts in one batch can cause impact damage, uneven finishing, and longer cycle times. Judging parts while wet. Water film can hide scratches and residue until drying reveals them. Inspect after drying. Need Help with Your Finishing Process? Send us your part material, dimensions, current surface condition, and target finish requirements. Our finishing team can help recommend suitable finishing machines, media, compounds, and a test process direction for your specific application. Contact our finishing team → Related Resources Vibratory Finishing Machine Grinding Finishing Machine Disc Finishing Machines Barrel Finishing Machines Rotary Barrel Tumbling Machines Magnetic Finishing Machines
  • How to Polish Acrylic Parts Without Haze, Scratches, or Edge Burn
    How to Polish Acrylic Parts Without Haze, Scratches, or Edge Burn May 15 , 2026
    .jtj-article { color: #1f2933; font-family: Arial, Helvetica, sans-serif; line-height: 1.72; font-size: 16px; } .jtj-article * { box-sizing: border-box; } .jtj-article a { color: #0b63ce; text-decoration: none; } .jtj-article a:hover { text-decoration: underline; } .jtj-article img { display: block; width: 100%; height: auto; } .jtj-article .jtj-hero, .jtj-article .jtj-image { border: 1px solid #e5e7eb; border-radius: 8px; overflow: hidden; margin: 0 0 28px; background: #f8fafc; } .jtj-article .jtj-hero-content { padding: 26px; } .jtj-article .jtj-kicker { margin: 0 0 8px; color: #53606f; font-size: 14px; font-weight: 700; text-transform: uppercase; letter-spacing: .08em; } .jtj-article h1 { margin: 0 0 14px; font-size: clamp(28px, 4vw, 42px); line-height: 1.16; color: #111827; } .jtj-article h2 { margin: 34px 0 14px; font-size: 26px; line-height: 1.25; color: #111827; } .jtj-article h3 { margin: 22px 0 8px; font-size: 19px; color: #172033; } .jtj-article p { margin: 0 0 16px; } .jtj-article ul, .jtj-article ol { margin: 0 0 18px 20px; padding: 0; } .jtj-article li { margin: 7px 0; } .jtj-article .jtj-note, .jtj-article .jtj-cta { border-left: 4px solid #0b63ce; background: #f3f8ff; padding: 18px 20px; border-radius: 6px; margin: 24px 0; } .jtj-article .jtj-cta { background: #10233f; color: #fff; border-left-color: #f59e0b; } .jtj-article .jtj-cta a { color: #fff; font-weight: 700; text-decoration: underline; } .jtj-article .jtj-grid { display: grid; grid-template-columns: repeat(2, minmax(0, 1fr)); gap: 18px; margin: 22px 0; } .jtj-article .jtj-card { border: 1px solid #e5e7eb; border-radius: 8px; padding: 18px; background: #fff; } .jtj-article .jtj-caption { margin: 0; padding: 10px 14px; color: #5b6675; font-size: 14px; background: #f8fafc; } .jtj-article .jtj-table-wrap { overflow-x: auto; margin: 20px 0 26px; border: 1px solid #e5e7eb; border-radius: 8px; } .jtj-article table { width: 100%; min-width: 760px; border-collapse: collapse; background: #fff; } .jtj-article th, .jtj-article td { padding: 13px 14px; border-bottom: 1px solid #e5e7eb; text-align: left; vertical-align: top; } .jtj-article th { background: #f1f5f9; color: #111827; font-weight: 700; } @media (max-width: 720px) { .jtj-article { font-size: 15px; } .jtj-article .jtj-hero-content { padding: 20px; } .jtj-article .jtj-grid { grid-template-columns: 1fr; } .jtj-article h2 { font-size: 23px; } } Plastic Part Finishing How to Polish Acrylic Parts Without Haze, Scratches, or Edge Burn Transparent acrylic parts are unforgiving. A small burr, a light sanding mark, or a little heat at the edge can turn into visible haze once the part is assembled under light. For machined acrylic blocks, optical covers, display parts, and transparent plastic components, the goal is not just to make the part shiny. The process must keep edges clean, preserve clarity, and avoid internal stress or cloudy surfaces. If your acrylic parts still look cloudy after polishing, the issue is often not the final polishing step alone. It may come from cutter marks, overly aggressive media, dry friction heat, dirty compound, poor separation, or stacking damage after finishing. A controlled surface finishing process should treat acrylic as a soft, heat-sensitive visual material, not as a normal metal part. Quick answer: For acrylic polishing, start with the lowest mechanical force that can remove the previous tool marks. Use fine plastic or dry finishing media, keep the load cushioned, avoid long high-friction cycles, and inspect the part under side light after each stage. The Real Problem: Clear Parts Show Every Process Mistake Metal parts can often tolerate a slightly aggressive deburring cycle because later polishing or plating may hide small marks. Acrylic is different. The material is transparent, relatively soft, and sensitive to heat. If the process creates micro-scratches or edge stress, the defect may become more visible after cleaning, drying, or customer assembly. Surface haze: the part looks frosted instead of clear, especially on flat faces. Fine circular scratches: the part reflects light but shows swirl marks under inspection. White edges: corners or machined edges become milky after finishing. Rounded functional details: small steps, holes, or threads lose definition after too much time in the machine. Start by Separating Three Different Jobs 1. Tool Mark Reduction If CNC cutter lines are deep, choose a controlled pre-smoothing stage. Do not jump directly to a bright polishing step and expect it to remove every line. 2. Clarity Polishing For the final surface, use fine media or dry finishing material that can improve gloss without cutting new scratches into the acrylic. 3. Edge Protection Reduce part-on-part impact by controlling batch size, media-to-part ratio, and unloading method. 4. Cleaning and Inspection Residue can look like haze. Clean parts gently and inspect under both top light and side light before judging the process. Diagnostic Table for Acrylic Polishing Defects Symptom Likely Cause What to Check Recommended Adjustment Flat surface remains cloudy after polishing Tool marks are too deep, media is too coarse, or polishing time is not matched to the previous step Inspect an unfinished part under side light and compare cutter line depth before and after finishing Add a controlled pre-smoothing stage, then use finer media for the final gloss stage Fine swirl marks appear after drying Media or dry polishing material is contaminated with hard particles Check whether the machine bowl, media, separator, and storage bin contain metal chips or coarse abrasive dust Clean the machine, separate acrylic media from metal media, and refresh compound or dry finishing material Edges turn white or look stressed Excessive friction heat, aggressive media shape, or too much cycle time Check edge temperature, cycle length, and whether sharp media corners are striking the same area repeatedly Shorten the cycle, reduce amplitude or speed, and test softer plastic or dry finishing media Small holes or details become rounded Over-processing or media too large for delicate features Measure critical dimensions before and after each test cycle Use shorter test increments and choose media that contacts the surface without wedging into details Wet or Dry Finishing: Which Is Safer for Acrylic? Wet processing helps control heat and flush away debris. It can be useful when acrylic parts have machining dust, light burrs, or residue from previous operations. The risk is that water quality, dirty compound, or poor drying may leave marks that look like haze. If wet finishing is used, match it with suitable finishing compounds, clean water, and gentle drying. Dry finishing can improve gloss on visual plastic parts when the abrasive load is mild and the media is clean. It is often useful for final appearance work, but it can also create heat if the cycle runs too long or the machine is overloaded. Before polishing, check cutter marks, edge whiteness, and internal details. Deep marks need controlled smoothing before final gloss polishing. Media Selection for Acrylic Parts For light burrs and soft edge blending: test fine plastic media or mild finishing media before considering anything more aggressive. For final gloss improvement: test clean dry finishing material or very fine polishing media that will not introduce new scratch patterns. For holes, slots, and narrow grooves: avoid media shapes that can lodge inside features or hammer against transparent walls. For large flat faces: reduce part-on-part contact and keep the media bed full enough to cushion the parts. For small acrylic parts, a vibratory finishing machine can be suitable when the process force is controlled. For more delicate parts, a slower rotary barrel tumbling machine may reduce impact. If the goal is a dry final gloss stage, review suitable dry finishing media and test in small batches first. Need to confirm a process before batch production? Send JINTAIJIN your acrylic part photos, material grade if known, dimensions, current surface condition, and target clarity. We can help review whether your problem is caused by machining marks, media selection, machine force, compound, or handling after polishing. Contact our finishing team with your acrylic polishing requirement Common Mistakes That Make Acrylic Parts Worse Using metal deburring logic on acrylic. Acrylic needs lower force and cleaner media than many metal parts. Only extending cycle time. Longer time can increase haze, heat, and edge rounding if the media is wrong. Ignoring the CNC surface. Deep cutter marks should be corrected before the final polishing stage. Mixing media between materials. Metal chips and abrasive dust can scratch transparent plastic. Judging the part while it is still wet. Water film can hide fine scratches and residue until the part dries. Dumping polished parts into hard containers. Many acrylic scratches happen after the machine cycle, during unloading and inspection. After polishing, inspect both surface gloss and internal visual clarity. A good acrylic process should improve appearance without softening functional geometry. Final Recommendation Acrylic polishing should be built as a staged process: reduce machining marks first, polish for clarity second, and protect the part during unloading third. The right equipment may be a vibratory finisher, barrel tumbler, or dry finishing setup, but the process should always be tested with real sample parts before batch production. Send us your acrylic part details for process advice. Include part photos, size, wall thickness, holes or slots, current defect photos, target finish, and expected batch quantity. JINTAIJIN can help recommend a suitable finishing machine, media, compound, and sample test direction for your acrylic polishing application. Request acrylic polishing process support
  • How to Polish Bathroom Hardware Parts Without Water Spots or Uneven Brightness
    How to Polish Bathroom Hardware Parts Without Water Spots or Uneven Brightness May 15 , 2026
    .jtj-article { max-width: 980px; margin: 0 auto; color: #1f2933; font-family: Arial, Helvetica, sans-serif; font-size: 16px; line-height: 1.72; } .jtj-article * { box-sizing: border-box; } .jtj-article h1, .jtj-article h2, .jtj-article h3 { color: #12212f; line-height: 1.28; margin: 0 0 14px; } .jtj-article h1 { font-size: 34px; margin-bottom: 18px; } .jtj-article h2 { font-size: 24px; margin-top: 36px; } .jtj-article h3 { font-size: 19px; margin-top: 24px; } .jtj-article p { margin: 0 0 16px; } .jtj-article a { color: #0b6fb3; text-decoration: underline; text-underline-offset: 3px; } .jtj-article .jtj-lead { font-size: 18px; color: #344454; margin-bottom: 22px; } .jtj-article .jtj-hero, .jtj-article .jtj-image { margin: 24px 0 28px; } .jtj-article img { width: 100%; height: auto; display: block; border-radius: 6px; } .jtj-article figcaption { color: #607080; font-size: 14px; margin-top: 8px; } .jtj-article .jtj-note, .jtj-article .jtj-cta { border-left: 4px solid #0b6fb3; background: #f2f7fb; padding: 18px 20px; margin: 24px 0; border-radius: 0 6px 6px 0; } .jtj-article .jtj-cta { background: #eef7f2; border-left-color: #25824b; } .jtj-article ul { padding-left: 22px; margin: 0 0 18px; } .jtj-article li { margin-bottom: 8px; } .jtj-article .jtj-table-wrap { overflow-x: auto; margin: 22px 0; border: 1px solid #d8e0e8; border-radius: 6px; } .jtj-article table { width: 100%; min-width: 760px; border-collapse: collapse; background: #fff; } .jtj-article th, .jtj-article td { padding: 12px 14px; border-bottom: 1px solid #e5ebf0; text-align: left; vertical-align: top; } .jtj-article th { background: #f5f8fa; color: #12212f; font-weight: 700; } .jtj-article .jtj-related { display: flex; flex-wrap: wrap; gap: 10px; margin: 18px 0 4px; } .jtj-article .jtj-related a { display: inline-block; border: 1px solid #c9d7e3; border-radius: 999px; padding: 8px 12px; text-decoration: none; background: #fff; color: #164d76; } @media (max-width: 768px) { .jtj-article { font-size: 15px; line-height: 1.68; } .jtj-article h1 { font-size: 27px; } .jtj-article h2 { font-size: 21px; } .jtj-article .jtj-lead { font-size: 16px; } .jtj-article .jtj-note, .jtj-article .jtj-cta { padding: 15px; } } How to Polish Bathroom Hardware Parts Without Water Spots or Uneven Brightness Bathroom hardware parts such as faucet components, valve bodies, decorative caps, brass fittings, and plated accessories need a bright and clean surface. But in production, these parts often come out with uneven brightness, cloudy areas, water spots, or over-rounded edges after tumbling and polishing. These defects usually appear because the process is not matched to the part material, geometry, cleaning step, and drying method. For bathroom hardware, the finishing process must improve appearance while protecting decorative surfaces, threaded areas, sealing faces, and edges that affect assembly. Quick answer: If bathroom hardware parts have water spots or uneven brightness, check the full process: media selection, compound, rinse water, drying speed, part loading, and whether the part needs separate smoothing and polishing stages. Do not solve every surface problem by extending tumbling time. Why Bathroom Hardware Is Sensitive to Finishing Defects Bathroom hardware parts are often made from brass, zinc alloy, stainless steel, or plated base materials. Many of them have visible decorative surfaces, holes, threads, sealing faces, and curved surfaces. A small surface defect can be obvious after plating, coating, or final inspection. Because these parts are appearance-sensitive, the process must avoid two opposite problems: under-finishing and over-finishing. Under-finishing leaves rough texture, gray surface, or dull areas. Over-finishing rounds details, damages edges, or creates part-on-part marks. Diagnose the Surface Problem First Before changing media or compound, identify the exact defect. Water spots, cloudy surfaces, dull areas, and impact marks come from different causes. Defect Likely Cause What to Check Recommended Adjustment White or cloudy water spots Hard water, poor rinsing, or slow drying Rinse quality, drying time, trapped water Improve rinsing and dry parts quickly with controlled airflow Uneven brightness Uneven media contact or mixed surface condition Part geometry, loading ratio, media shape Reduce batch load and test media that reaches curved areas Gray or dirty surface Metal fines, old media, or unsuitable compound Water clarity, compound concentration, media cleanliness Clean the process and use suitable finishing compound Rounded edges or softened details Cycle time or cutting action is too aggressive Edge radius, thread areas, sealing faces Shorten cutting stage and add a gentler polishing step Marks from parts hitting each other Overloading or insufficient media support Part-to-media ratio, part weight, batch size Increase media support and reduce direct part contact Choose Media Based on Material and Visible Surfaces Bathroom hardware parts may require different media depending on the starting surface and final appearance requirement. If the part has casting texture or strong burrs, a controlled cutting stage may be necessary. If the surface is already close to the target finish, aggressive media can create unnecessary scratches or edge loss. Ceramic media can help with stronger smoothing and deburring. Plastic media may be safer for softer materials or decorative surfaces. For bright finishing, steel media or another polishing stage may be considered after the surface has been prepared. Bathroom hardware often needs both surface smoothing and bright finishing. The cleaning and drying step also affects final appearance. Do Not Ignore Compound and Water Quality Finishing compounds help clean the surface, suspend metal fines, control foam, and improve lubrication. For brass, zinc alloy, and plated-base parts, compound selection can affect whether the surface looks clean or cloudy after finishing. If parts look bright while wet but show spots after drying, the problem is often rinse water, residue, or drying speed. In that case, changing media alone will not solve the issue. Check water hardness, rinse flow, compound level, and whether parts sit wet for too long after separation. Separate Smoothing From Bright Finishing A single step may not be enough for bathroom hardware. Rough castings, stamped parts, or machined parts often need one stage to correct the surface and another stage to improve brightness. Trying to get final shine from a strong cutting process can create uneven brightness or rounded details. Stage 1: controlled deburring or smoothing to reduce rough texture and sharp edges. Stage 2: finer finishing or polishing to improve brightness and consistency. Final step: rinse and dry quickly to prevent water spots or residue. Control Loading to Prevent Impact Marks Bathroom hardware parts often have curved decorative surfaces that show dents easily. If the batch is overloaded, parts may collide and create marks that require manual repair. A vibratory finishing machine can process these parts efficiently, but the part-to-media ratio must protect visible surfaces. For longer or heavier parts, tub vibrators may provide more controlled movement. Common Mistakes to Avoid Extending cycle time to solve water spots. Using aggressive media on decorative surfaces that only need final polishing. Ignoring hard water, dirty rinse water, or slow drying. Loading too many parts and creating impact marks. Using one process for burr removal, smoothing, and bright finishing without testing. Not checking holes, threads, and sealing faces after finishing. Related Solutions If you are improving a bathroom hardware finishing process, these pages may help you compare suitable machines, media, compounds, and drying equipment: Vibratory Finishing Machine Tub Vibrators Ceramic Media Plastic Media Finishing Compounds Industrial Dryers Need a Cleaner Finish for Bathroom Hardware Parts? Send us your part material, photos, current surface condition, target brightness, burr location, water spot issue, and batch quantity. JINTAIJIN can help review whether your process needs different media, compound, rinsing, drying, or a two-stage finishing route. Contact our finishing team for bathroom hardware polishing support
  • How to Polish Aluminum Motorcycle Parts Without Impact Marks or Uneven Shine
    How to Polish Aluminum Motorcycle Parts Without Impact Marks or Uneven Shine May 15 , 2026
    .jtj-article { max-width: 980px; margin: 0 auto; color: #1f2933; font-family: Arial, Helvetica, sans-serif; font-size: 16px; line-height: 1.72; } .jtj-article * { box-sizing: border-box; } .jtj-article h1, .jtj-article h2, .jtj-article h3 { color: #12212f; line-height: 1.28; margin: 0 0 14px; } .jtj-article h1 { font-size: 34px; margin-bottom: 18px; } .jtj-article h2 { font-size: 24px; margin-top: 36px; } .jtj-article h3 { font-size: 19px; margin-top: 24px; } .jtj-article p { margin: 0 0 16px; } .jtj-article a { color: #0b6fb3; text-decoration: underline; text-underline-offset: 3px; } .jtj-article .jtj-lead { font-size: 18px; color: #344454; margin-bottom: 22px; } .jtj-article .jtj-hero, .jtj-article .jtj-image { margin: 24px 0 28px; } .jtj-article img { width: 100%; height: auto; display: block; border-radius: 6px; } .jtj-article figcaption { color: #607080; font-size: 14px; margin-top: 8px; } .jtj-article .jtj-note, .jtj-article .jtj-cta { border-left: 4px solid #0b6fb3; background: #f2f7fb; padding: 18px 20px; margin: 24px 0; border-radius: 0 6px 6px 0; } .jtj-article .jtj-cta { background: #eef7f2; border-left-color: #25824b; } .jtj-article ul { padding-left: 22px; margin: 0 0 18px; } .jtj-article li { margin-bottom: 8px; } .jtj-article .jtj-table-wrap { overflow-x: auto; margin: 22px 0; border: 1px solid #d8e0e8; border-radius: 6px; } .jtj-article table { width: 100%; min-width: 760px; border-collapse: collapse; background: #fff; } .jtj-article th, .jtj-article td { padding: 12px 14px; border-bottom: 1px solid #e5ebf0; text-align: left; vertical-align: top; } .jtj-article th { background: #f5f8fa; color: #12212f; font-weight: 700; } .jtj-article .jtj-related { display: flex; flex-wrap: wrap; gap: 10px; margin: 18px 0 4px; } .jtj-article .jtj-related a { display: inline-block; border: 1px solid #c9d7e3; border-radius: 999px; padding: 8px 12px; text-decoration: none; background: #fff; color: #164d76; } @media (max-width: 768px) { .jtj-article { font-size: 15px; line-height: 1.68; } .jtj-article h1 { font-size: 27px; } .jtj-article h2 { font-size: 21px; } .jtj-article .jtj-lead { font-size: 16px; } .jtj-article .jtj-note, .jtj-article .jtj-cta { padding: 15px; } } How to Polish Aluminum Motorcycle Parts Without Impact Marks or Uneven Shine Aluminum motorcycle parts often need a clean, bright, and uniform surface, but they are also easy to damage during batch finishing. Brake levers, handles, brackets, covers, and long decorative parts may come out with dents, cloudy areas, uneven shine, or rounded edges if the process is not controlled. The problem is usually not just the machine. It is the full process: part geometry, media support, cutting strength, loading ratio, compound, cycle time, separation, and drying. This guide explains how to diagnose the defect and build a safer polishing process for aluminum motorcycle parts. Quick answer: For aluminum motorcycle parts, avoid using an aggressive process just to get shine faster. Start with controlled smoothing, protect thin edges and holes, use enough media to separate parts, and test whether the part needs a second polishing stage for brightness. Why Motorcycle Aluminum Parts Are Difficult to Finish Motorcycle parts are often long, curved, thin, and full of holes, ribs, grooves, or decorative surfaces. These features make the part attractive, but they also create finishing risks. During mass finishing, exposed edges may receive too much contact while recessed grooves or inner corners remain dull. Long parts may hit each other if the load is too dense. Holes and slots may trap media. A process that works for small blocks or simple castings may not work for motorcycle levers or brackets. Diagnose the Defect First Before changing media or extending the cycle time, identify what defect appears after finishing. The correction depends on the actual problem. Defect Likely Cause What to Check Recommended Adjustment Small dents or impact marks Part-on-part collision or media too heavy Batch load, part-to-media ratio, part length Increase media support, reduce load, or use gentler media Outer edges are bright but grooves stay dull Media contact is not reaching recessed areas Groove depth, media shape, media size Test media that can enter grooves without lodging Edges become too rounded Cutting action or cycle time is too strong Edge radius, media grade, finishing time Shorten cutting stage and add a gentler polishing stage Cloudy or gray surface Aluminum fines, dirty water, or unsuitable compound Water clarity, compound concentration, media cleanliness Improve rinsing and use aluminum-safe compound Media stuck in holes Media size is close to hole or slot size Hole diameter, slot width, media dimensions Change media size or shape and improve separation Use Enough Media to Protect the Parts For aluminum motorcycle parts, media does more than cut the surface. It also cushions and separates the parts. If the batch contains too many parts and not enough media, parts can collide directly and create visible impact marks. A vibratory finishing machine can process motorcycle parts efficiently, but the loading ratio must be tested. Long levers and brackets should move with the media, not hit each other repeatedly in the bowl. Long aluminum motorcycle parts need controlled media contact around holes, grooves, edges, and large visible surfaces. Choose Media by Shape and Surface Goal Aluminum is softer than steel, so aggressive media can remove material too quickly. For decorative or visible motorcycle parts, plastic media is often a safer starting point because it is lighter and gentler than heavy cutting media. Ceramic media may be useful when burrs are stronger or casting texture is heavy, but it should be tested carefully on thin edges, holes, and decorative surfaces. Media shape also matters: the media must reach grooves and holes without getting stuck. Separate Deburring From Bright Polishing A common mistake is expecting one aggressive process to remove burrs and produce a bright final appearance. For aluminum motorcycle parts, this can create over-rounded edges and uneven shine. A more stable process may use two stages. The first stage removes burrs and smooths machining or casting marks. The second stage improves brightness with a gentler media, compound, or polishing process. Compound and Rinsing Affect Aluminum Appearance Aluminum can become gray or cloudy if metal fines and dirty solution stay on the surface. Finishing compounds help clean the part, suspend fines, improve lubrication, and reduce staining. If parts look acceptable in the machine but become dull after rinsing or drying, check water quality, compound concentration, rinse flow, and drying speed. Surface brightness is not only a media problem. Common Mistakes to Avoid Loading too many long parts together and causing part-on-part collision. Using strong cutting media on decorative aluminum surfaces. Extending cycle time until holes and edges become over-rounded. Choosing media without checking hole size, groove depth, and slot width. Ignoring dirty water and aluminum fines during wet finishing. Trying to get burr removal and final brightness from one process step. Recommended Test Method Test motorcycle parts with the actual production geometry, not only simple sample blocks. Check the lever end, thin edges, mounting holes, decorative grooves, inner corners, and visible surfaces after each test. Start with moderate cycle time and inspect the most fragile edge first. Compare at least two media shapes if grooves or holes remain dull. Reduce loading density if dents or contact marks appear. Add a second polishing stage if the surface is smooth but not bright enough. Record media, compound, water flow, loading ratio, and cycle time for repeat production. Related Solutions If you are developing a process for aluminum motorcycle parts, these pages may help you compare suitable machines, media, compounds, and drying equipment: Vibratory Finishing Machine Tub Vibrators Plastic Media Ceramic Media Finishing Compounds Industrial Dryers Need a Polishing Process for Aluminum Motorcycle Parts? Send us your part photos, aluminum alloy, burr location, hole and groove dimensions, current surface condition, target brightness, and batch quantity. JINTAIJIN can help review whether your process needs different media, a gentler loading method, or a two-stage finishing route. Contact our finishing team for motorcycle part polishing support
  • How to Polish Plastic Eyeglass Frames Without Whitening, Scratches, or Deformation
    How to Polish Plastic Eyeglass Frames Without Whitening, Scratches, or Deformation May 14 , 2026
    .jtj-article { max-width: 980px; margin: 0 auto; color: #1f2933; font-family: Arial, Helvetica, sans-serif; font-size: 16px; line-height: 1.72; } .jtj-article * { box-sizing: border-box; } .jtj-article h1, .jtj-article h2, .jtj-article h3 { color: #12212f; line-height: 1.28; margin: 0 0 14px; } .jtj-article h1 { font-size: 34px; margin-bottom: 18px; } .jtj-article h2 { font-size: 24px; margin-top: 36px; } .jtj-article h3 { font-size: 19px; margin-top: 24px; } .jtj-article p { margin: 0 0 16px; } .jtj-article a { color: #0b6fb3; text-decoration: underline; text-underline-offset: 3px; } .jtj-article .jtj-lead { font-size: 18px; color: #344454; margin-bottom: 22px; } .jtj-article .jtj-hero, .jtj-article .jtj-image { margin: 24px 0 28px; } .jtj-article img { width: 100%; height: auto; display: block; border-radius: 6px; } .jtj-article figcaption { color: #607080; font-size: 14px; margin-top: 8px; } .jtj-article .jtj-note, .jtj-article .jtj-cta { border-left: 4px solid #0b6fb3; background: #f2f7fb; padding: 18px 20px; margin: 24px 0; border-radius: 0 6px 6px 0; } .jtj-article .jtj-cta { background: #eef7f2; border-left-color: #25824b; } .jtj-article ul { padding-left: 22px; margin: 0 0 18px; } .jtj-article li { margin-bottom: 8px; } .jtj-article .jtj-table-wrap { overflow-x: auto; margin: 22px 0; border: 1px solid #d8e0e8; border-radius: 6px; } .jtj-article table { width: 100%; min-width: 760px; border-collapse: collapse; background: #fff; } .jtj-article th, .jtj-article td { padding: 12px 14px; border-bottom: 1px solid #e5ebf0; text-align: left; vertical-align: top; } .jtj-article th { background: #f5f8fa; color: #12212f; font-weight: 700; } .jtj-article .jtj-related { display: flex; flex-wrap: wrap; gap: 10px; margin: 18px 0 4px; } .jtj-article .jtj-related a { display: inline-block; border: 1px solid #c9d7e3; border-radius: 999px; padding: 8px 12px; text-decoration: none; background: #fff; color: #164d76; } @media (max-width: 768px) { .jtj-article { font-size: 15px; line-height: 1.68; } .jtj-article h1 { font-size: 27px; } .jtj-article h2 { font-size: 21px; } .jtj-article .jtj-lead { font-size: 16px; } .jtj-article .jtj-note, .jtj-article .jtj-cta { padding: 15px; } } How to Polish Plastic Eyeglass Frames Without Whitening, Scratches, or Deformation 
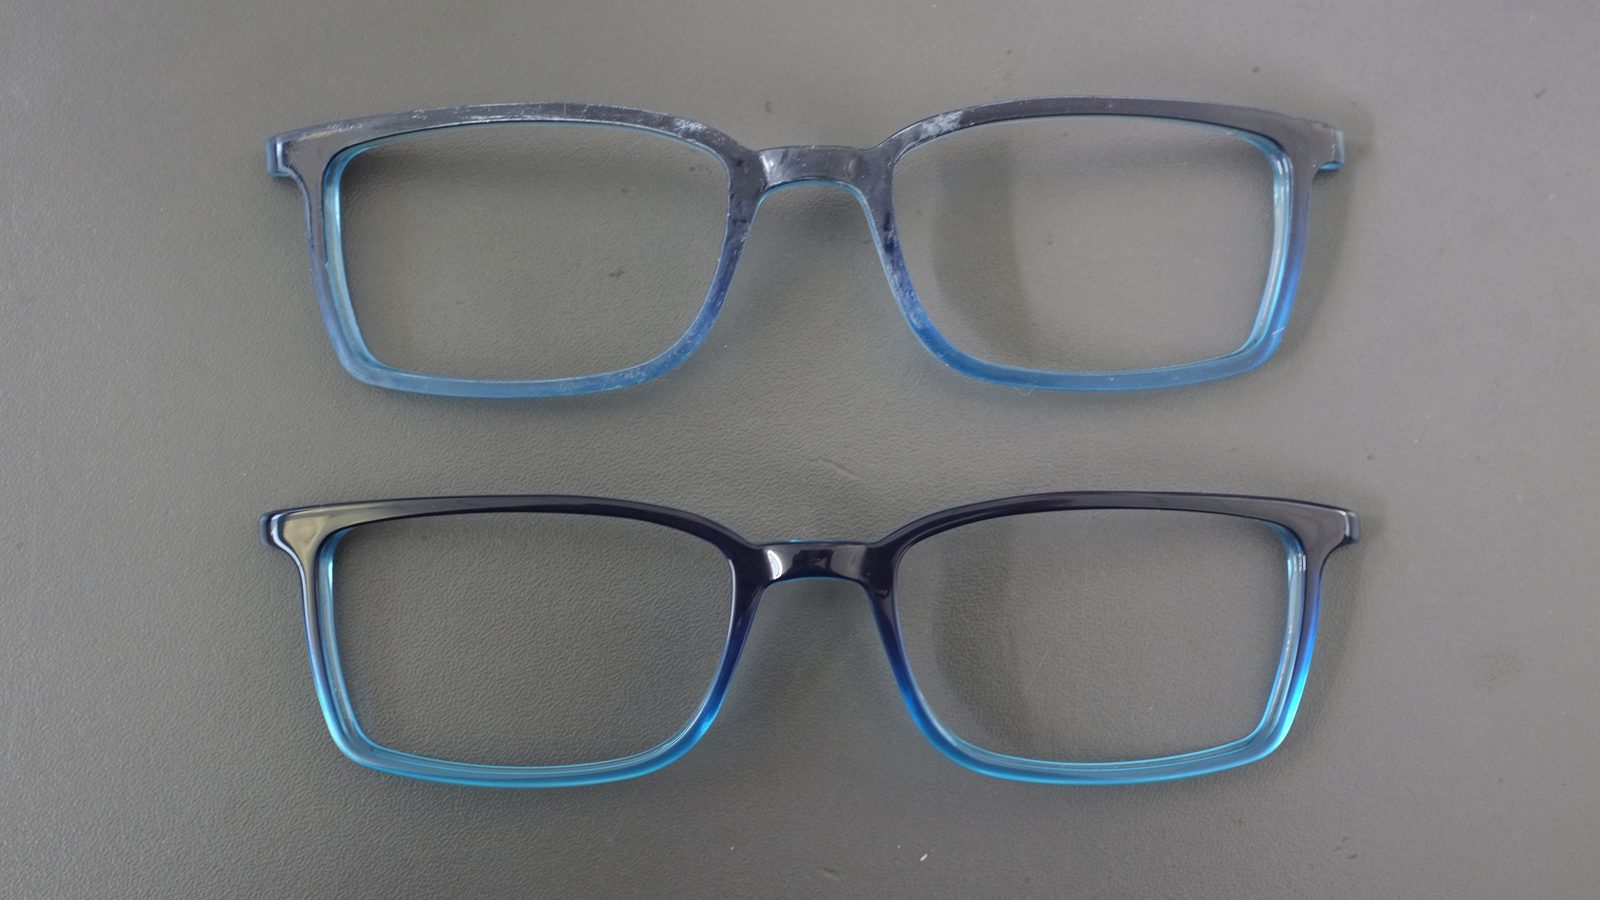
Plastic and acetate eyeglass frames are difficult to polish in batches because the surface must become bright and smooth without whitening, deep scratches, rounded corners, or heat deformation. A process that is too aggressive can damage the frame shape. A process that is too weak leaves mold marks, sanding marks, dull edges, or cloudy areas around the bridge and temples. This guide explains how to diagnose common polishing problems on plastic eyeglass frames and how to build a more stable finishing process for frame fronts, temples, corners, and visible outer surfaces. Quick answer: If plastic eyeglass frames turn white, keep scratches, or lose shape during polishing, check media hardness, processing time, heat buildup, part loading, and whether the process needs separate smoothing and final polishing stages. Plastic frames usually need gentler contact and better process control than metal hardware. Why Plastic Eyeglass Frames Are Easy to Damage Plastic frame materials such as acetate, PC, TR-type plastics, and other decorative plastics can look premium when polished correctly, but they are sensitive to heat, impact, and over-cutting. The surface may become cloudy or white if the polishing action is too dry, too hot, too rough, or too long. Eyeglass frames also have many difficult areas: the bridge, lens groove, hinge zone, temple connection, inner corners, and thin edge transitions. These areas can trap media, receive uneven contact, or become rounded before the large visible surface becomes bright. Start by Identifying the Defect Do not solve every plastic polishing problem by increasing time. First decide whether the defect is a cutting issue, a heat issue, a media issue, or a loading issue. Defect Likely Cause What to Check Recommended Adjustment White or cloudy surface Excessive friction, dry contact, or unsuitable media Media type, moisture, compound, cycle time Use gentler media and reduce heat or friction buildup Fine scratches remain Previous sanding marks too deep or media too coarse Initial surface preparation and media grade Add controlled smoothing before final polishing Frame corners become rounded Cycle time too long or contact too aggressive Corner radius, edge definition, processing time Shorten cutting stage and separate final polishing Frame shape changes or warps Heat, pressure, or excessive batch impact Machine motion, load size, drying temperature Reduce heat exposure and avoid heavy part-on-part contact Bridge or hinge areas remain dull Media cannot reach narrow or recessed areas Media size, lens groove, hinge geometry Test smaller or better-shaped media without causing lodging Use a Gentler Process Than Metal Deburring Plastic eyeglass frames should not be treated like stainless steel or die-cast parts. Heavy cutting media may remove material quickly, but it can also create haze, edge loss, or deformation. For plastic surfaces, the process should focus on controlled smoothing and gradual brightness improvement. Depending on the material and surface condition, plastic media, selected soft finishing media, or dry finishing media may be more suitable than aggressive cutting media. The final choice depends on frame material, sanding mark depth, corner requirements, and target gloss. Control Heat and Friction Heat is one of the biggest risks in plastic frame polishing. Even if the frame does not visibly melt, excess friction can soften the surface, create cloudy areas, or make sharp details look rounded. Dry polishing, long cycle time, and dense loading can all increase temperature. If whitening appears after the process, check whether the parts were overheated or rubbed too aggressively. A shorter process with better media selection is often safer than a long cycle with strong friction. Plastic frames need a controlled process that improves gloss while protecting corners, lens grooves, and thin frame sections. Prevent Part-on-Part Damage Eyeglass frames are light, thin, and easy to scratch. If too many frames are loaded together, they can rub or hit each other during finishing. This creates new marks that must be repaired manually. Loading ratio matters as much as media selection. The parts should be supported by enough media so frames do not stack, twist, or rub directly against each other. For some frame designs, a gentler machine motion or special fixture method may be needed. Choose the Machine by Frame Shape A standard vibratory finishing machine can work for many small plastic components, but eyeglass frames may require lower impact and better control. For delicate frames, a slower tumbling or dedicated plastic polishing process may reduce scratches and deformation. If the frames are long, thin, or easily tangled, the key question is not only machine capacity. You need to test whether the frames move freely, stay separated, and receive even contact around the bridge, temples, and lens grooves. Use Compound or Dry Media Carefully In wet processing, finishing compounds can help lubrication, cleaning, and surface protection. In dry finishing, the media must be clean and suitable for the plastic surface. Dirty or worn media can transfer residue and create uneven gloss. If the frame looks bright in some areas but hazy in others, check media cleanliness, compound residue, drying method, and whether narrow areas are trapping dust or slurry. When to Use a Two-Stage Process Many plastic eyeglass frames need at least two stages. One step removes sanding marks or mold marks. Another step improves gloss and surface uniformity. Trying to do both in one strong process often causes whitening or edge loss. Stage 1: controlled smoothing to remove visible sanding marks and surface unevenness. Stage 2: gentle polishing to improve gloss without overheating the frame. Final check: inspect bridge areas, corners, lens grooves, and temple connection points. Common Mistakes to Avoid Using metal deburring logic on plastic frames. Increasing cycle time until the surface turns white or edges lose definition. Ignoring heat buildup during dry or high-friction finishing. Loading too many frames together and creating scratches from part-on-part contact. Choosing media that cannot reach lens grooves or bridge corners. Skipping final inspection under consistent lighting. Related Solutions If you are improving plastic eyeglass frame polishing, these pages may help you compare suitable finishing media, compounds, and machine options: Plastic Media Dry Finishing Media Finishing Compounds Rotary Barrel Tumbling Machines Vibratory Finishing Machine Finishing Applications Need a Safer Polishing Process for Plastic Frames? Send us your frame material, photos, current surface condition, sanding mark depth, whitening problem, target gloss, and batch quantity. JINTAIJIN can help review whether your process needs different media, shorter cycle time, better loading control, or a two-stage polishing route. Contact our finishing team for plastic eyeglass frame polishing support
  • How to Finish Medical Instrument Parts Without Scratches, Residue, or Rounded Edges
    How to Finish Medical Instrument Parts Without Scratches, Residue, or Rounded Edges May 14 , 2026
    .jtj-article { max-width: 980px; margin: 0 auto; color: #1f2933; font-family: Arial, Helvetica, sans-serif; font-size: 16px; line-height: 1.72; } .jtj-article * { box-sizing: border-box; } .jtj-article h1, .jtj-article h2, .jtj-article h3 { color: #12212f; line-height: 1.28; margin: 0 0 14px; } .jtj-article h1 { font-size: 34px; margin-bottom: 18px; } .jtj-article h2 { font-size: 24px; margin-top: 36px; } .jtj-article h3 { font-size: 19px; margin-top: 24px; } .jtj-article p { margin: 0 0 16px; } .jtj-article a { color: #0b6fb3; text-decoration: underline; text-underline-offset: 3px; } .jtj-article .jtj-lead { font-size: 18px; color: #344454; margin-bottom: 22px; } .jtj-article .jtj-hero, .jtj-article .jtj-image { margin: 24px 0 28px; } .jtj-article img { width: 100%; height: auto; display: block; border-radius: 6px; } .jtj-article figcaption { color: #607080; font-size: 14px; margin-top: 8px; } .jtj-article .jtj-note, .jtj-article .jtj-cta { border-left: 4px solid #0b6fb3; background: #f2f7fb; padding: 18px 20px; margin: 24px 0; border-radius: 0 6px 6px 0; } .jtj-article .jtj-cta { background: #eef7f2; border-left-color: #25824b; } .jtj-article ul { padding-left: 22px; margin: 0 0 18px; } .jtj-article li { margin-bottom: 8px; } .jtj-article .jtj-table-wrap { overflow-x: auto; margin: 22px 0; border: 1px solid #d8e0e8; border-radius: 6px; } .jtj-article table { width: 100%; min-width: 760px; border-collapse: collapse; background: #fff; } .jtj-article th, .jtj-article td { padding: 12px 14px; border-bottom: 1px solid #e5ebf0; text-align: left; vertical-align: top; } .jtj-article th { background: #f5f8fa; color: #12212f; font-weight: 700; } .jtj-article .jtj-related { display: flex; flex-wrap: wrap; gap: 10px; margin: 18px 0 4px; } .jtj-article .jtj-related a { display: inline-block; border: 1px solid #c9d7e3; border-radius: 999px; padding: 8px 12px; text-decoration: none; background: #fff; color: #164d76; } @media (max-width: 768px) { .jtj-article { font-size: 15px; line-height: 1.68; } .jtj-article h1 { font-size: 27px; } .jtj-article h2 { font-size: 21px; } .jtj-article .jtj-lead { font-size: 16px; } .jtj-article .jtj-note, .jtj-article .jtj-cta { padding: 15px; } } How to Finish Medical Instrument Parts Without Scratches, Residue, or Rounded Edges Medical instrument parts and precision metal components often have strict surface requirements. The part must be clean, smooth, and consistent, but critical edges, holes, hinge areas, and contact surfaces cannot be over-rounded or damaged. A finishing process that works for general hardware may create scratches, residue, uneven texture, or excessive edge loss on these parts. This article explains how to diagnose common finishing defects on medical instrument parts and how to build a more controlled deburring, smoothing, and polishing process for precision components. Quick answer: For medical instrument parts, start with a controlled low-damage process. Choose media by part geometry, not only by material. Keep cutting action moderate, use clean compound and water flow, avoid overloading the batch, and inspect edges, holes, and contact surfaces after every test stage. Why Medical Instrument Parts Are Easy to Damage During Finishing Many medical instrument parts are made from stainless steel or other corrosion-resistant alloys. These materials can be strong, but the part geometry is often thin, curved, or precision-machined. Small changes to edges or surfaces can affect assembly, appearance, or inspection results. The main challenge is balance. The process must remove burrs, smooth machining marks, and improve the surface without creating new defects. If the media is too aggressive, edges become rounded. If the process is too mild, burrs and tool marks remain. Diagnose the Defect Before Changing the Process Do not treat every surface problem as a polishing problem. Scratches, cloudy surfaces, residue, and rounded edges come from different causes. The table below helps separate the issue before choosing media or changing cycle time. Defect Likely Cause What to Check Recommended Adjustment Fine scratches remain after finishing Media too coarse or previous tool marks too deep Initial roughness, media grade, process sequence Add a controlled smoothing step before final polishing Edges are rounded too much Cycle time too long or cutting action too strong Edge radius, media type, processing time Reduce cutting time and test gentler media Residue or gray film remains Dirty water, wrong compound, metal fines Water clarity, compound concentration, media cleanliness Improve rinsing and use suitable finishing compound Holes or hinge areas still have burrs Media cannot reach critical features Hole size, slot width, media shape Test media shape and size against actual geometry Surface differs from part to part Batch load is too high or parts shield each other Part-to-media ratio, nesting, loading density Reduce load and improve media support around parts Choose Media for the Critical Feature Media selection should start from the most sensitive area of the part. For medical instrument components, this may be a thin edge, hinge slot, contact surface, hole, or curved face. If the media cannot reach that area, burrs remain. If the media is too aggressive, the feature may lose definition. Ceramic media can be useful for controlled cutting and smoothing, but it must be selected carefully for precision parts. For more delicate surfaces, plastic media or a finer finishing step may reduce impact marks and over-cutting. Real sample comparison: precision parts need controlled surface improvement without losing edge definition or leaving residue. Control Batch Loading to Prevent Part-on-Part Marks Scratches and dents often come from part-on-part contact, not from the media alone. If parts are thin, curved, or have polished visible surfaces, a crowded batch can cause more rework than it saves. A vibratory finishing machine can process many precision parts efficiently, but the load ratio must be tested. There should be enough media to separate and support the parts during movement. For longer or fragile components, a tub vibrator or special loading method may provide better control. Use Compound and Rinsing to Avoid Residue Residue is a serious problem for precision parts because it can hide in holes, slots, or hinge areas. Finishing compounds help suspend metal fines, improve cleaning, control foam, and reduce staining. The compound should match the material and the required surface condition. If parts look acceptable when wet but show film after drying, check rinse quality, water cleanliness, compound concentration, and drying speed. For high-appearance parts, the cleaning and drying step should be treated as part of the finishing process, not an afterthought. When a Two-Stage Process Is Safer Precision parts often need more than one stage. One aggressive step may remove burrs quickly, but it may also round edges or leave a matte surface. A staged process gives better control. Stage 1: light deburring or smoothing to remove sharp edges and machining marks. Stage 2: finer finishing or polishing to improve texture and appearance. Final cleaning: rinse and dry parts quickly to prevent residue, water spots, or trapped contamination. Inspection: check holes, slots, edges, and contact surfaces under consistent lighting. Common Mistakes to Avoid Using strong cutting media to solve every burr problem. Extending cycle time until precision edges become rounded. Ignoring part-on-part contact in crowded batches. Choosing media without checking holes, hinge areas, and slots. Skipping rinse and drying control after wet finishing. Judging only the visible surface while missing residue in hidden areas. Related Solutions If you are developing a stable finishing process for medical instrument parts or other precision components, these pages may help you compare suitable machines, media, and compounds: Vibratory Finishing Machine Tub Vibrators Ceramic Media Plastic Media Finishing Compounds Industrial Dryers Need a Controlled Finishing Process for Precision Parts? Send us your part material, photos, drawing, burr locations, critical edges, surface requirement, and batch quantity. JINTAIJIN can help review whether your process needs different media, a staged finishing route, improved cleaning, or a more controlled machine setup. Contact our finishing team for precision part finishing support
1 2 3 4 5 6 7 8 9

A total of 9 pages

#+86-592-2381506

Email : info@surface-polish.com

Headquarters address : No. 31, Xinchang Road, Xinyang Industrial Zone, Haicang District, Xiamen

click here to leave a message

Leave A Message
If you are interested in our products and want to know more details,please leave a message here,we will reply you as soon as we can.

Home

Products

whatsapp

contact