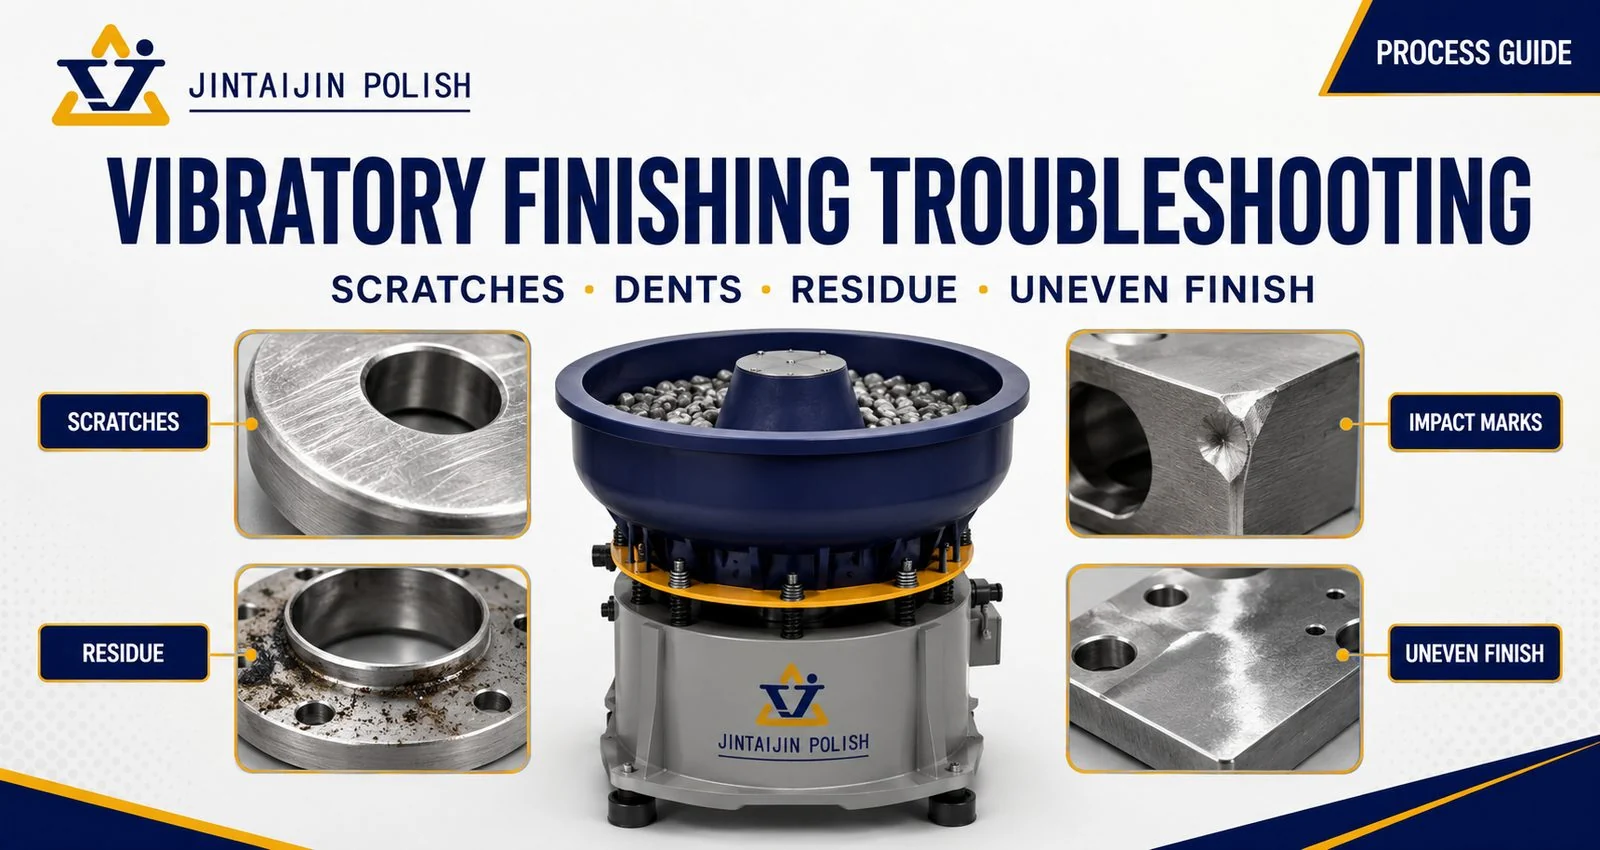
When a batch leaves the vibratory finisher with scratches, impact marks, stains, inconsistent brightness, or insufficient burr removal, the first reaction is often to extend the cycle or choose more aggressive media. That response can increase part damage without correcting the real problem.
A reliable diagnosis begins with the defect pattern. Is the problem present on every part or only some parts? Is it concentrated on edges, flat faces, recesses, or areas where parts can contact each other? Did the defect exist before finishing, appear during the wet process, or become visible only after drying? These observations narrow the number of variables that should be tested.
First Determine Where the Defect Was Created
Not every defect visible after tumbling was created inside the machine. Machining lines, casting porosity, heat-treatment scale, mixed alloy conditions, dirty storage bins, and poor rinsing can all appear to be finishing failures. Use the following sequence before changing the process.
- Keep an incoming reference part. Photograph it under top light and side light, and mark any existing defects.
- Inspect one wet part during the cycle. Check whether burrs are being reduced and whether new contact marks are forming.
- Rinse and dry the sample completely. Water film can hide fine scratches, stains, and compound residue.
- Compare location and direction. Random marks usually indicate contamination or part contact; repeated directional marks may come from the incoming manufacturing process.
- Separate process stages. If possible, inspect after deburring, rinsing, and drying so the defect can be assigned to the correct stage.
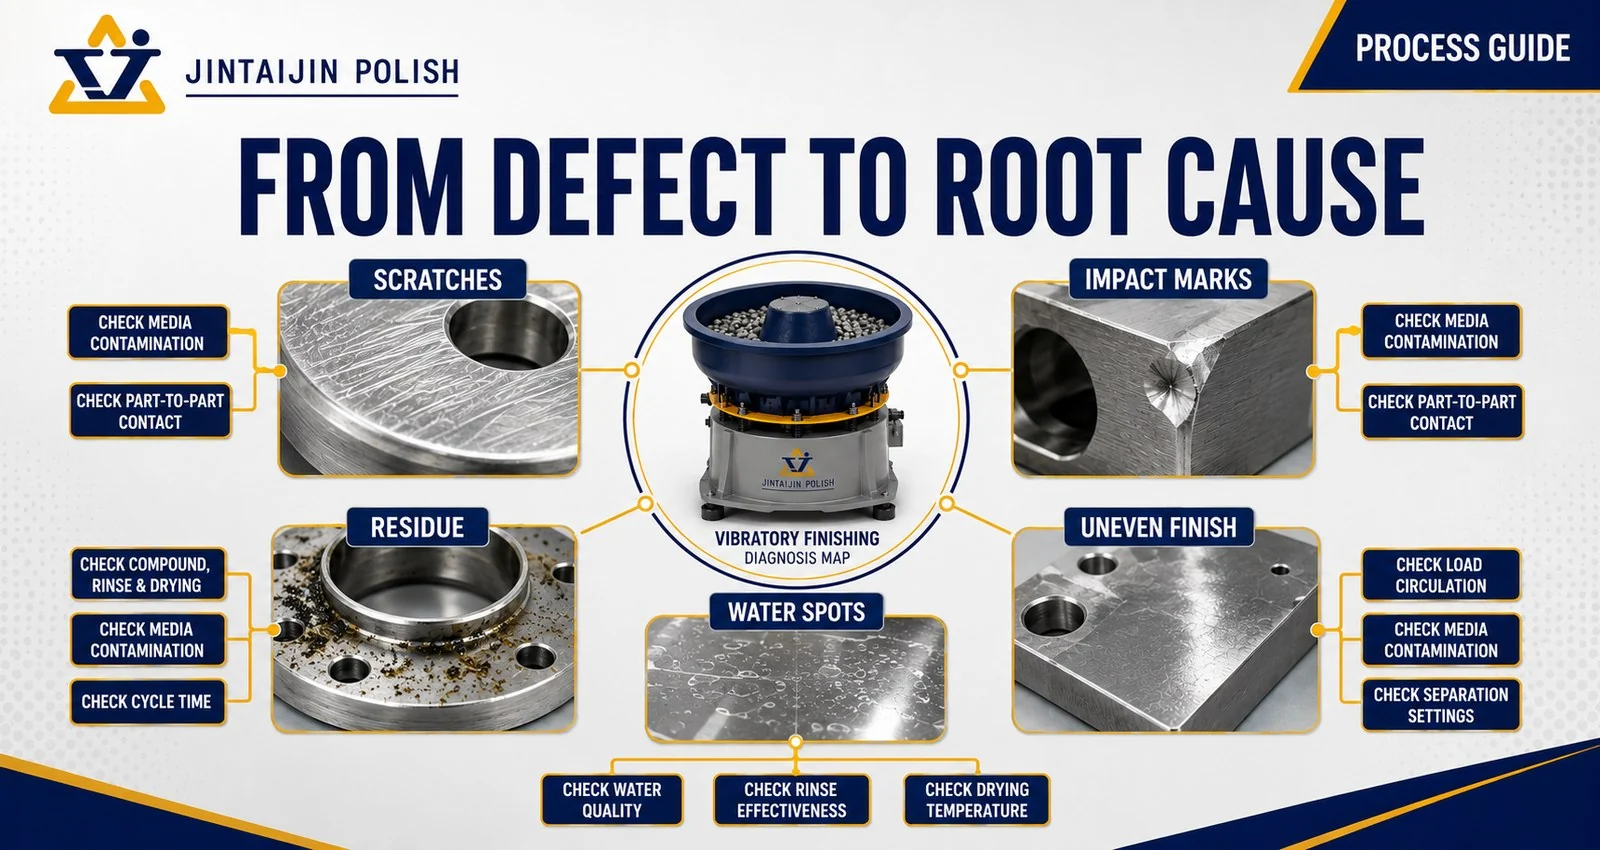
Vibratory Finishing Defect Diagnostic Table
Use this table as a starting point, not as a substitute for a controlled process test. The same visual symptom can have more than one cause.
| Observed Symptom | Likely Causes | Check First | Controlled Test |
|---|---|---|---|
| Random scratches | Contaminated media, trapped metal chips, mixed media, or an overly aggressive media shape | Bowl cleanliness, media storage, screen condition, and recent part changes | Clean the machine and run a small batch with known clean media |
| Dents or impact marks | Part-on-part contact, insufficient cushioning, excessive part loading, or strong machine motion | Media-to-parts ratio, part weight, drop points, and circulation pattern | Reduce the part count and increase cushioning media while holding other settings constant |
| Uneven finish within one batch | Poor load circulation, overloaded chamber, mixed incoming surfaces, or uneven compound distribution | Load movement at several positions and incoming part consistency | Run a smaller, sorted batch and verify that all parts circulate freely |
| Sticky film or residue | Incorrect compound concentration, dirty process water, insufficient rinsing, or overloaded solution | Dosing method, water quality, foam level, odor, and rinse condition | Prepare a fresh solution at the supplier's recommended concentration and add a clean rinse |
| Water spots or discoloration | Hard water, slow drying, contaminated rinse water, retained liquid, or material oxidation | Rinse conductivity, drying delay, part pockets, and dryer temperature | Use clean rinse water and begin drying immediately after separation |
| Rounded edges or lost detail | Excessive cycle time, high cutting rate, media too large, or excessive amplitude | Critical dimensions before and after processing | Run shorter timed samples and measure edge change at each interval |
| Burrs remain after a long cycle | Worn media, poor media contact, unsuitable media shape, low machine energy, or burrs beyond process capability | Media size loss, burr orientation, load movement, and machine settings | Compare fresh media and the current media using identical timed samples |
| Media lodges in holes or slots | Media dimension matches a hole, slot, thread, or internal feature | Smallest and largest media dimensions compared with every opening | Test a non-lodging size or shape and verify separation before production |
How to Fix Scratches on Finished Parts
First confirm whether the marks are random or repeatable. Random scratches that vary from part to part often indicate loose metal chips, broken media, contamination from a previous batch, or contact between parts. Similar marks in the same direction and location may already exist from machining, grinding, handling, or storage.
Checks to perform
- Empty and inspect the working chamber, drain, screens, and recirculation tank for metal chips.
- Confirm that different media grades or materials were not mixed during storage or changeover.
- Inspect media for fractured sharp edges and excessive wear.
- Compare the smallest media dimension with holes, recesses, and gaps where chips may become trapped.
- Run a clean reference part through a freshly cleaned process to separate machine contamination from incoming defects.
How to Reduce Part-on-Part Damage and Dents
Part-on-part damage occurs when the load does not contain enough media to separate and cushion components, or when heavy and delicate parts collide during circulation, loading, discharge, or separation. Thin aluminum, zinc die castings, decorative parts, and components with finished faces require particular attention.
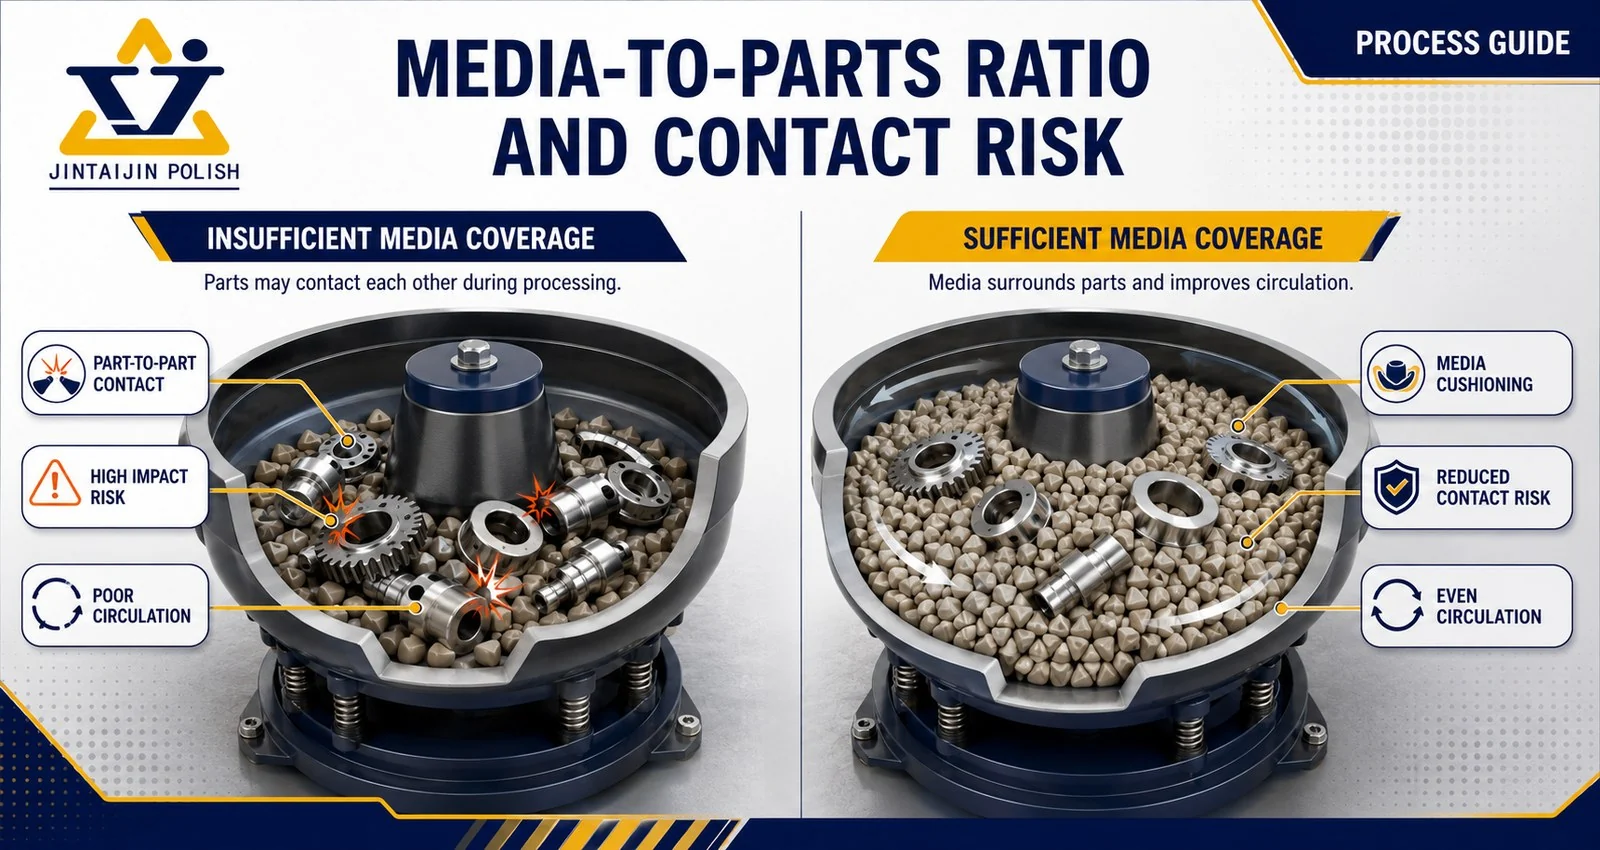
Corrective actions to test
- Reduce parts per batch. Use accepted pieces per cycle, not maximum physical chamber fill, as the production target.
- Increase cushioning media. The correct ratio must be established by test because part geometry and sensitivity vary.
- Reduce excessive motion. Check amplitude, weight settings, and load circulation according to the machine instructions.
- Check transfer points. Damage may occur at loading, separation, or discharge rather than in the main chamber.
- Consider compartment processing. High-value, long, or contact-sensitive parts may require an appropriately configured tub vibrator with dividers.
How to Correct Uneven Finishing
An uneven batch may be caused by unstable circulation, an overloaded chamber, inconsistent incoming surfaces, or poor distribution of water and compound. Before changing media, watch the complete load at startup and during steady operation. Parts and media should move through the working channel without dead zones, bridging, or repeated accumulation in one area.
Use parts with comparable material, starting surface, geometry, and weight in the same validated recipe.
Look for dead zones, nesting, bridging, floating parts, or components that repeatedly stay at the surface.
Verify dosing, drain condition, water flow, and whether fresh compound reaches the entire load.
Remove marked samples from different locations and compare results after equal exposure time.
How to Remove Residue, Stains, and Water Spots
The compound is part of the finishing process, not simply a lubricant. It helps clean the part and media, carries removed material away, controls foam and corrosion, and can influence brightness. Too much compound may leave a film or create excessive foam; too little may allow soil and metal fines to redeposit.
Record concentration using a repeatable dosing method rather than estimating by appearance. Check water quality, process temperature, tank condition, drain flow, and the time between separation and drying. Blind holes and pockets may retain contaminated liquid, so part orientation during rinsing and drying can also matter.
A useful isolation test
- Prepare fresh water and finishing compound at the recommended starting concentration.
- Process a small, documented sample without changing the media or machine settings.
- Rinse half the sample with clean water and leave the other half on the normal rinse route.
- Dry both groups immediately using the same method.
- Compare film, spots, color, and brightness under the same light.
What to Do When Burrs Remain or the Cycle Is Too Long
Longer processing does not guarantee more deburring. Media loses size and cutting performance as it wears. A shape that cannot contact the burr location will remain ineffective even after many hours. Low energy, poor circulation, an unsuitable compound, or a burr that should be reduced in machining can also limit the process.
- Measure the burr. Record height, thickness, location, and orientation instead of using only a visual description.
- Inspect media wear. Compare current media size and shape with fresh media.
- Check contact access. Confirm that media can reach the edge or internal feature without lodging.
- Use timed samples. Inspect at fixed intervals to determine when useful cutting slows and over-processing begins.
- Review upstream machining. Extremely large, folded, or inconsistent burrs may require tool or cutting-condition changes before mass finishing.
Media Selection Must Match the Defect and the Part
Media material controls the general cutting or polishing action, while size and shape determine contact, access, cushioning, and lodging risk. Treat media, compound, machine motion, and cycle time as one recipe.
| Process Need | Typical Starting Direction | Main Risk to Check |
|---|---|---|
| Heavy deburring on harder metals | Ceramic media with a suitable cutting grade | Excessive edge change, lodging, and surface scratches |
| Controlled cutting on aluminum or softer alloys | Plastic media selected for part geometry | Part staining, slow cutting, and media lodging |
| Brightening or burnishing | Steel finishing media with compatible chemistry | Media weight, part deformation, cleanliness, and drying |
Use a One-Variable Troubleshooting Method
Changing media, cycle time, compound, water flow, and machine settings together may produce a better batch, but it does not show which change solved the problem. The result will be difficult to repeat. Use a short controlled test plan.
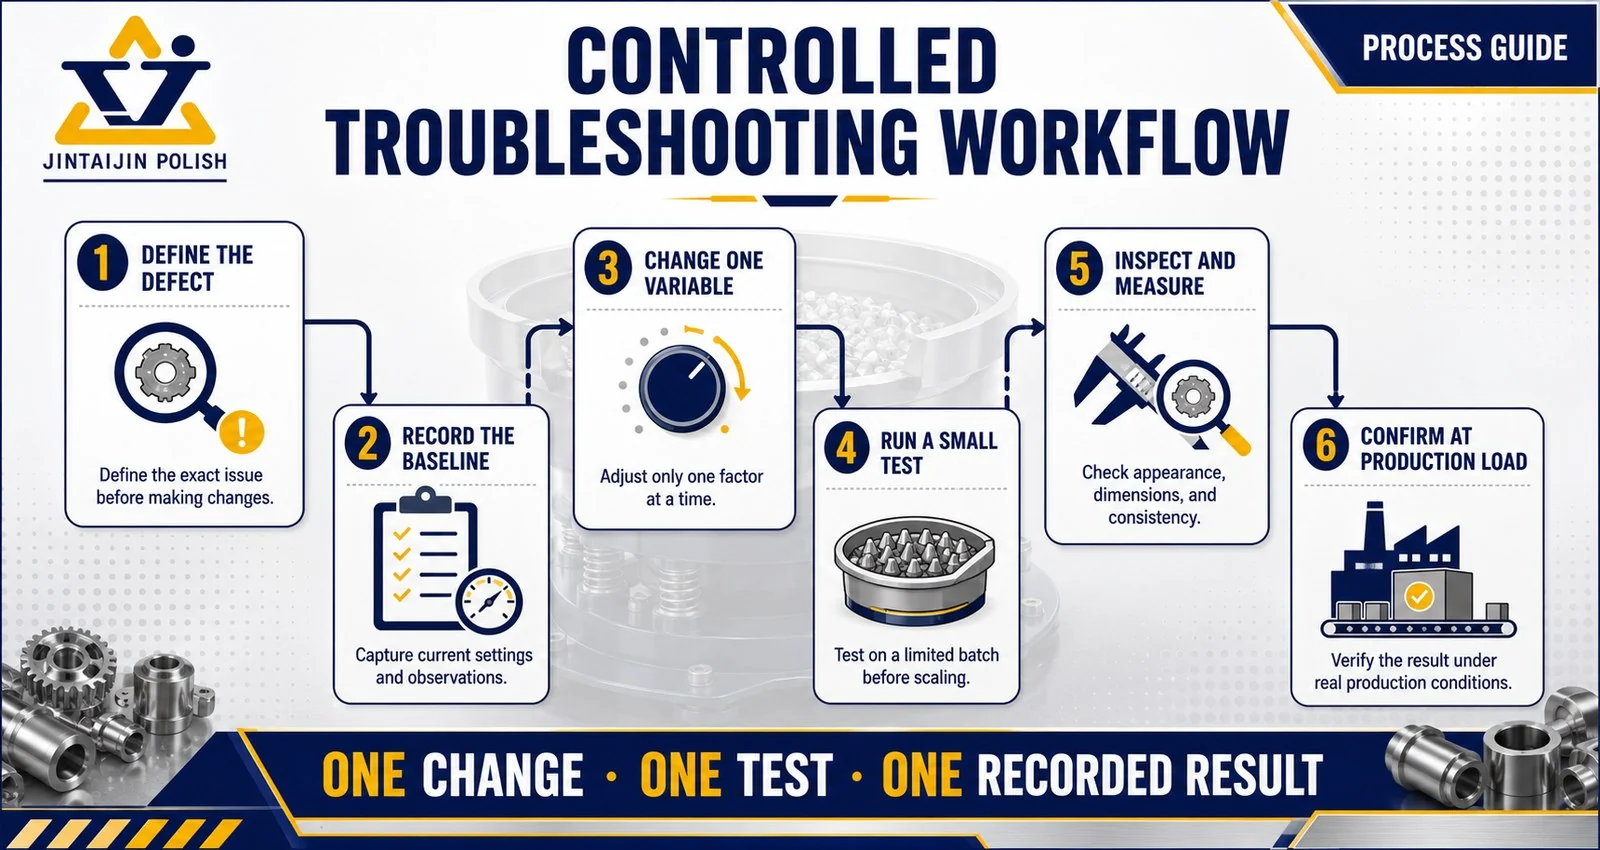
Use photos, location, frequency, dimensions, and an accepted reference sample.
Part count, media ratio, compound, water, machine settings, temperature, and time.
Choose the variable most directly connected to the observed defect.
Keep the remaining conditions unchanged and use marked parts.
Dry completely, use consistent lighting, and measure critical dimensions.
Scale only after the small test is successful, then document the approved recipe.
When the Problem Is Actually Machine Selection
Some defects cannot be solved by recipe changes alone. Long parts may bridge in a bowl. Heavy or high-value components may need separation from each other. Insufficient chamber volume can force an unstable load, while unsuitable separation can create damage after the finishing cycle.
If the current machine cannot provide safe circulation, practical capacity, or controlled separation, use our vibratory finishing machine selection guide to compare bowl and tub machines, calculate usable capacity, and define the complete process line.
See the Vibratory Finishing Process in Action
The video below shows the movement of a vibratory polishing machine. Actual media, compound, loading ratio, and machine settings must be validated for the workpiece and target finish.
Information to Send for Process Diagnosis
A useful process review requires more than a photo of the machine. Send the following information so the failure can be evaluated against the complete recipe.
- Part material, dimensions, weight, drawing, and critical tolerances
- Clear photos before finishing, after wet processing, and after complete drying
- The exact defect, affected location, reject rate, and accepted reference
- Machine type, chamber capacity, settings, part count, and media-to-parts ratio
- Media material, shape, size, age, and approximate wear condition
- Compound name, concentration, dosing method, water source, and flow arrangement
- Cycle time, rinsing method, separation method, drying process, and production target
Need help diagnosing a vibratory finishing defect? Send your part photos, process recipe, current defect, and target finish. Our finishing team can review the likely cause and recommend a controlled test direction.
Frequently Asked Questions
Why do parts get scratched during vibratory finishing?
Common causes include metal-chip contamination, fractured or mixed media, an unsuitable media shape, part-on-part contact, and defects that were already present before finishing. Clean the system and compare incoming and finished samples before changing abrasive grade.
How can part-on-part damage be prevented?
Reduce the number of parts, increase cushioning media, verify circulation, reduce excessive motion if appropriate, and inspect loading and separation points. Delicate or high-value parts may require compartment processing.
Why is the finish inconsistent across the same batch?
The load may not be circulating evenly, the machine may be overloaded, the incoming parts may have different surface conditions, or compound and water may not be distributed consistently. Run a smaller sorted batch and observe movement throughout the chamber.
Should I increase cycle time when burrs remain?
Not automatically. Check media wear, contact access, machine motion, burr size, and process capability. Timed samples can show whether useful cutting is still occurring or whether longer processing only increases edge rounding and cost.
Can one vibratory finishing recipe be used for different parts?
Only when the parts have compatible materials, geometry, starting condition, damage risk, and target finish. A recipe should be validated for each part family and documented with an acceptable operating range.
When should media be replaced?
Replace or replenish media when wear changes its cutting performance, size distribution, shape, or separation behavior. Track media dimensions and process time instead of waiting for a visible process failure.
Related Equipment and Process Resources
Diagnose the Process Before Changing the Process
A repeatable finishing result comes from a documented recipe and controlled testing. Define the defect, identify the most likely variable, verify the change on a small sample, and confirm it again at production load.
 +86-592-2381506

 IPv6 network supported