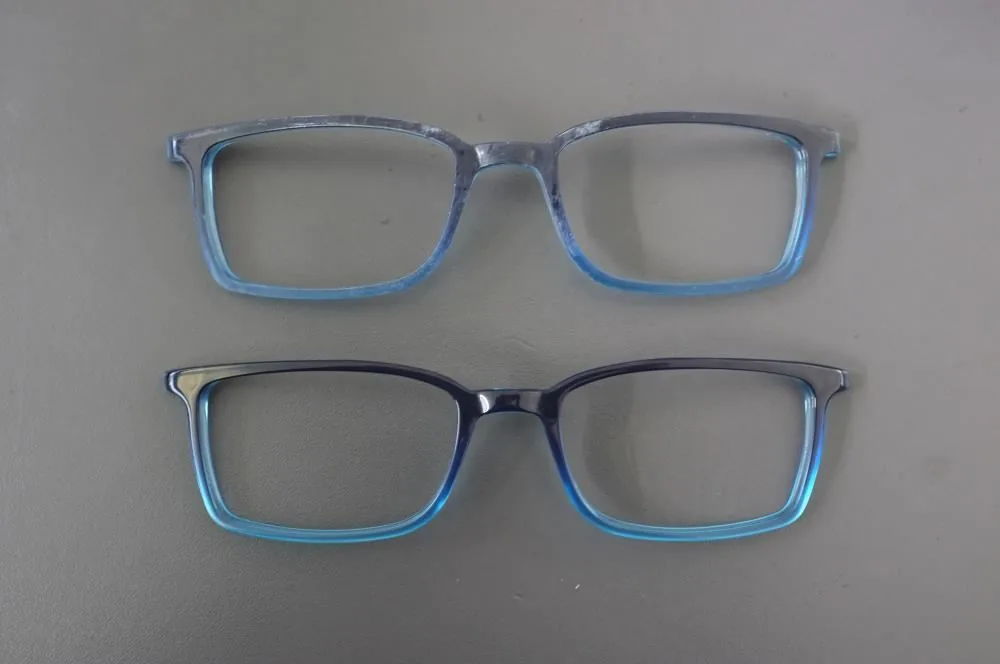
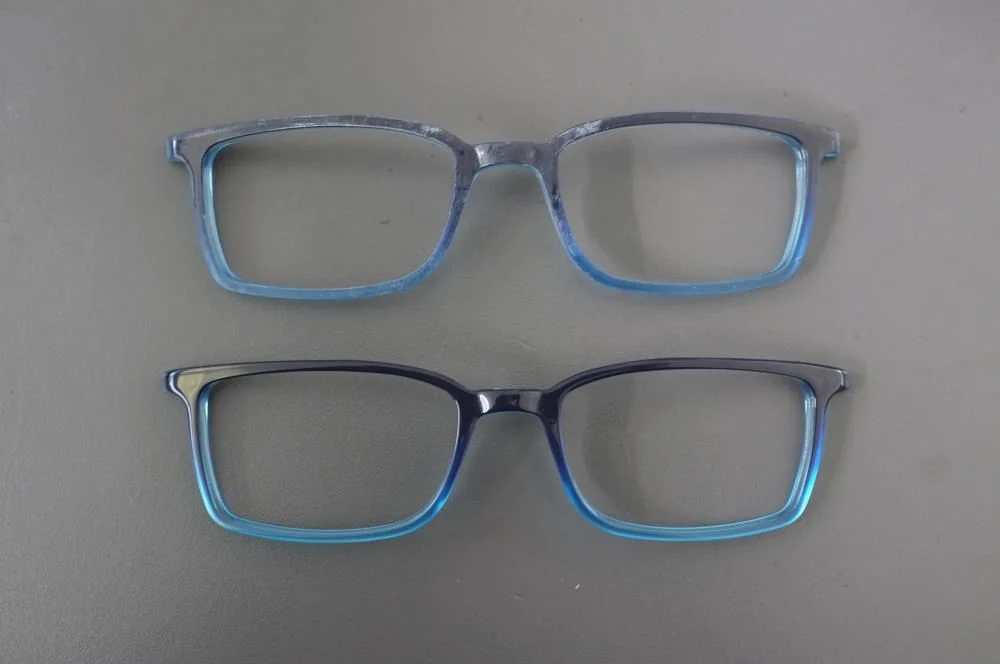
Cellulose acetate can produce deep color and a high-gloss appearance, but it also makes process control important. Excessive friction can raise the part temperature. Aggressive media can soften edges or leave new marks. Compound residue can collect around hinges, grooves, and decorative details. Frames may also contact each other if the load is too dense or the media does not provide enough cushioning.
For these reasons, an acetate polishing line should be treated as a sequence of controlled stages. Wet processing is commonly evaluated for cleaning, controlled cutting, and pre-finishing. Dry tumbling with suitable wood or organic media is often evaluated for smoothing and luster development. Either method can fail when the media, loading ratio, moisture, compound, machine motion, and cycle time are not matched to the actual frame.
What Makes Acetate Frame Polishing Difficult?
The process is not difficult because acetate is simply "soft." The challenge is that several quality requirements must be protected at the same time.
- Shape and edge retention: rims, bridges, temples, and decorative transitions must remain consistent.
- Scratch control: trapped debris, worn media, or part-on-part contact can create visible marks.
- Temperature control: prolonged friction and poor ventilation can increase the risk of distortion or surface change.
- Color and clarity: dark, transparent, layered, and patterned acetate can reveal haze and residue differently.
- Detail access: hinge areas, grooves, holes, and tight radii may polish more slowly than broad surfaces.
- Batch consistency: a recipe that works for one sample may become unstable when the machine is fully loaded.
The acceptance standard should therefore include more than gloss. Before testing, define the permitted edge change, dimensional limits, color appearance, scratch level, deformation limit, and cleanliness around small features.
Dry vs Wet Tumbling for Acetate Frames
| Decision Factor | Dry Tumbling | Wet Tumbling |
|---|---|---|
| Typical role | Smoothing, fine polishing, and luster development | Cleaning, controlled cutting, deburring, and pre-finishing |
| Process media | Selected wood shapes or organic media with acetate-compatible polishing compound | Application-specific media, water, and a compatible liquid compound |
| Main advantage | No rinse water in the polishing stage and strong potential for final appearance development | Water carries away debris, supports cleaning, and helps control process heat |
| Main process risk | Heat buildup, dust, loaded media, and compound transfer | Over-cutting, media marks, water chemistry, incomplete rinsing, and drying defects |
| Downstream requirement | Dust and residue removal, by inspection | Rinsing, complete drying, and water or compound management |
Wet does not automatically mean glossier, and dry does not automatically mean rougher. The result comes from the complete recipe and the starting surface. Wet processing may prepare a consistent surface for a later dry polishing stage. A carefully developed dry process may deliver the final luster. The correct sequence must be selected from the defect that needs to be removed and the finish that must be protected.
A Practical Multi-Stage Process
- Inspect the starting frame. Separate cutting marks, gate marks, scratches, haze, residue, and geometry defects. Do not expect one tumbling stage to correct every condition.
- Complete necessary manual preparation. Severe gate marks, deep defects, and critical edges may require controlled machining, filing, sanding, or another preparation step before mass finishing.
- Run a wet pre-finish when required. Select media and compound to remove the targeted defect without rounding details or creating new scratches.
- Rinse and dry completely. Residual abrasive, moisture, or compound can contaminate the next stage and change the result.
- Develop the dry polishing stage. Match the wood or organic media, compound, loading ratio, ventilation, machine speed, and duration to the frame geometry and desired luster.
- Clean and inspect under controlled lighting. Check broad surfaces, internal rims, bridge transitions, temple ends, hinge areas, and transparent or dark colors.
Important process limit
Cycle time, rotational speed, media-to-parts ratio, compound dosage, and temperature limits cannot be copied safely from another factory. Frame thickness, acetate formulation, color, media condition, machine geometry, and batch density all change the result. Establish the recipe through staged trials and record every setting.
How to Select Media and Compound
Start with the smallest frame features
Measure holes, grooves, hinge recesses, rim channels, and the spacing between frame features. Media that can enter a feature but cannot move freely may lodge or leave an uneven finish. Media that is too large may polish only broad surfaces and miss tight areas.
Use cushioning to reduce frame contact
The media volume must be sufficient to separate and support the frames during movement. Increasing the number of frames per batch may improve apparent throughput but can create contact scratches, tangling, shadow areas, and inconsistent polishing. Accepted pieces per shift are more important than maximum pieces loaded into the barrel.
Match the compound to the process stage
A wet compound may provide cleaning, lubrication, wetting, and debris control. A dry polishing compound supports the cutting or luster action of the selected media. Confirm compatibility with the acetate color, the media, and downstream cleaning. Do not substitute a metal polishing compound without a controlled compatibility test.
Review the available dry polishing media, acetate polishing compound, and fine-stage acetate polishing fluid. Final selection should follow a sample test because the product name alone does not define the correct dosage or cycle.
Machine Selection for Dry and Wet Stages
Machine capacity should be based on usable process volume and safe frame loading, not nominal liters alone. For acetate frames, also evaluate barrel material, ventilation or heat management, speed control, loading and unloading access, compound handling, and cleaning between colors.
Dry Barrel Polishing
Evaluate wood barrel geometry, ventilation, adjustable motion, media loading, residue control, and safe batch handling.
View a wood barrel dry polishing machineWet Rotary Processing
Evaluate lining, speed control, liquid handling, drainage, rinsing, separation, and the risk of frames contacting each other.
View a wet rotary tumbling machineFor another process-focused explanation, see how to use a tumbling machine for acetate products and how to reduce whitening, scratches, and deformation on plastic eyeglass frames.
Troubleshooting Common Defects
| Observed Defect | Likely Process Cause | What to Check First |
|---|---|---|
| New scratches | Part contact, contaminated media, trapped chips, or overly aggressive action | Reduce frame loading, inspect media cleanliness, and compare a lower-intensity test |
| Haze or low gloss | Media is too coarse, loaded, dry, or incompatible with the compound and starting surface | Check media condition, compound distribution, moisture, and whether a finer stage is required |
| Softened edges | Excessive cutting action, long cycle, or unsuitable media geometry | Shorten the trial interval and inspect dimensional change at each checkpoint |
| Warping or shape change | Heat buildup, excessive load, poor ventilation, or aggressive machine settings | Record part and media temperature, reduce load, and review motion and ventilation |
| Residue in grooves | Excess compound, poor media movement, incomplete rinsing, or insufficient final cleaning | Check compound dosage, drainage, cleaning sequence, and feature access |
How to Validate a Production Recipe
A useful trial should produce a documented process window, not just one attractive sample. Use frames that represent the real range of colors, thicknesses, shapes, and starting defects.
- Photograph and label each frame before processing.
- Record media type and condition, compound, load ratio, speed, moisture or water flow, and starting temperature.
- Inspect at planned intervals rather than waiting until the end of a long cycle.
- Measure dimensional and edge changes at critical locations.
- Repeat the accepted recipe with a larger batch to check circulation and frame contact.
- Include loading, unloading, cleaning, rinsing, drying, and inspection when calculating output per shift.
Eyewear design and finishing requirements are closely connected. For a finished-product perspective on acetate frame construction and styling, visit Jingseyewear.
Frequently Asked Questions
Is dry or wet tumbling better for acetate eyeglass frames?
Neither method is universally better. Wet tumbling is often evaluated for cleaning, cutting, and pre-finishing. Dry tumbling is often evaluated for smoothing and luster development. The starting defect and target finish determine the route.
Can one machine complete the entire polishing process?
Sometimes one machine family can handle multiple stages, but different media and compounds may still be required. Frames with deep preparation marks or strict final appearance requirements commonly need more than one controlled stage.
How can scratches between frames be reduced?
Use enough media to cushion the frames, reduce the number of parts per batch, keep the media clean, remove trapped debris, and confirm that the machine motion does not cause frames to stack or interlock.
How long should acetate frames remain in the tumbler?
There is no reliable universal time. Inspect at short, documented intervals during development. Stop when the target defect is removed or the required appearance is reached, before edges, dimensions, or temperature move outside the acceptance limit.
Can different colors and frame designs share one recipe?
Only after testing. Transparent, dark, layered, and patterned acetate may reveal scratches, haze, and residue differently. Geometry and thickness also change movement and contact risk.
Build the Process Around Your Actual Frames
Send representative frame photos, material details, dimensions, starting defects, target appearance, and expected daily output. Jintaijin can review the application and define a practical dry, wet, or combined test direction before machine selection.
 +86-592-2381506

 IPv6 network supported