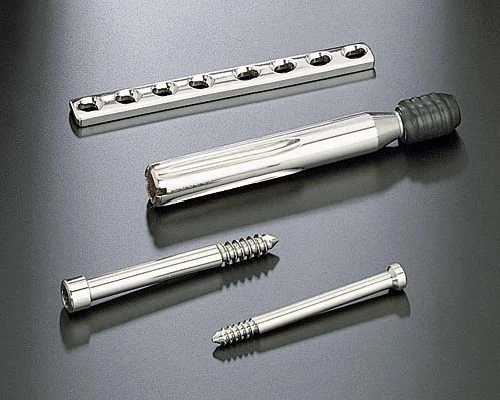
Titanium parts are used where low weight, corrosion resistance, strength, and appearance matter. Those same components may contain thin walls, threads, sealing faces, welded areas, sharp functional edges, or cosmetic surfaces that are easy to damage during batch finishing. The goal is therefore not simply to make the metal shiny. It is to produce a repeatable surface while protecting the features that make the part work.
Start with the Required Result, Not the Machine
The phrase "polish titanium" can describe several different production goals. Each goal requires a different process window, so the drawing and acceptance criteria should be reviewed before equipment is selected.
| Production Goal | What Must Be Defined | Main Risk |
|---|---|---|
| Deburring | Burr location, height, root thickness, orientation, and permitted edge radius | Rounding a functional edge before the burr root is removed |
| Surface smoothing | Starting and target roughness, directional marks, and areas excluded from treatment | Uneven contact or excessive stock removal on exposed corners |
| Cosmetic finishing | Gloss, texture, color consistency, viewing conditions, and acceptable witness marks | Part-on-part scratches, patchy appearance, or residue |
| Pre-coating preparation | Required cleanliness, surface profile, chemistry limits, and the next coating step | Embedded residue or contamination that affects adhesion |
Which Finishing Machine Fits Titanium Parts?
Machine selection depends on part size, geometry, load sensitivity, required cycle time, and whether the parts can contact each other. The table below provides a practical starting direction; the final choice still requires trials with production-representative parts.
| Machine Direction | Where It Fits | What to Validate |
|---|---|---|
| Vibratory finishing | General batch deburring, smoothing, cleaning, and controlled edge treatment | Circulation, part contact, media access, lodging, separation, and total cycle time |
| Centrifugal disc finishing | Small robust parts that need faster cutting or shorter cycle times | Rapid edge change, impingement, nesting, temperature, foam, and a narrower safe process window |
| Barrel or dry tumbling | Gentle dry smoothing and cosmetic finishing when liquid processing is undesirable | Longer cycles, dust control, media condition, heat, residue, and part separation |
| Fixture-based or manual polishing | Directional cosmetic work or parts with surfaces that must be treated selectively | Operator variation, local overheating, geometry change, and repeatability |
Medical-device applications may also require comparison with chemical or electrochemical routes. See our separate analysis of electropolishing versus mechanical vibratory polishing for titanium medical devices. The present guide focuses on general mechanical surface finishing and does not replace application-specific validation.
Select the Machine, Media, and Compound as One Process
A machine does not produce a finish by itself. The media determines where contact occurs and how aggressively material is removed. The compound controls cleaning, lubrication, foam, suspension of removed material, and interaction with the specific titanium alloy and downstream process.
Choose the cutting or smoothing action according to the starting defect and permitted stock removal. Begin conservatively for thin, delicate, or cosmetic parts.
The media must reach the target area without becoming trapped in holes, slots, recesses, or threads as it wears.
Use a chemistry that is compatible with the alloy, media, equipment, waste-treatment plan, and next manufacturing operation.
Use enough media and a safe part load to limit collisions, nesting, masking, and uneven circulation.
Do not copy a media recipe from another metal without testing. Titanium grade, heat treatment, surface condition, feature geometry, and finish target can all change the result. A compound suitable for one alloy or coating sequence may also be unsuitable for another. Review available mass-finishing compounds as process components, then validate the complete recipe on sample parts.
A Controlled Trial Procedure
- Document the starting condition. Photograph burrs and tool marks under repeatable lighting. Record critical dimensions, edge condition, roughness where specified, and any protected surfaces.
- Clean and segregate the process. Remove chips, oil, and contamination from parts, media, chamber, drains, screens, and containers. Prevent cross-contamination from previous jobs.
- Begin with a small marked batch. Use parts that represent the production range, including worst-case burrs and the most damage-sensitive geometry.
- Confirm movement before extending time. Observe circulation, media coverage, nesting, part-on-part contact, and whether liquid or dry media reaches the required areas.
- Inspect at short intervals. Remove, rinse or clean, dry, and inspect marked parts at fixed times. Record the point at which useful defect removal slows or protected edges begin to change.
- Optimize one variable at a time. Change media, machine energy, load, compound, flow, or time individually so the effect is understandable.
- Validate the complete production cycle. Include loading, finishing, separation, rinsing, drying, inspection, media wear, and repeat batches—not only the best sample from one trial.
Common Titanium Finishing Problems
| Symptom | Likely Direction | What to Check | Adjustment to Test |
|---|---|---|---|
| New scratches or dents | Part collisions, trapped debris, aggressive action, or poor cushioning | Part load, circulation path, media cleanliness, transfer, and separation | Reduce load, increase cushioning, clean the system, or use a gentler process |
| Burr remains but edge is rounding | Media contacts the surrounding edge more effectively than the burr root | Burr orientation, media access, burr thickness, and upstream machining | Change media geometry or reduce the heavy burr before batch finishing |
| Patchy or uneven finish | Poor circulation, nesting, masked surfaces, inconsistent starting condition, or dirty media | Part orientation, load distribution, media wear, fluid condition, and previous operations | Improve movement, reduce nesting, refresh media, or standardize the starting surface |
| Residue, spots, or color change | Incompatible chemistry, dirty solution, incomplete rinsing, or delayed drying | Compound dose, water quality, temperature, rinse coverage, pockets, and drying time | Validate chemistry, improve rinsing, control solution condition, and dry promptly |
Applications and Feature-Specific Risks
The same titanium alloy can require different finishing routes in aerospace hardware, medical instruments, consumer components, precision fasteners, and decorative products. Thin sections and threads may need conservative stock removal; broad cosmetic faces need protection from contact marks; deep recesses may not receive the same action as exposed edges.
Titanium eyewear frames are a useful example: hinges, weld areas, fine grooves, and coating interfaces can all react differently to the same batch process. When a product-development team is evaluating those details, it can also review the downstream context of an eyewear manufacturer rather than treating the frame as a simple metal sample.
What to Send for a Titanium Finishing Recommendation
A useful process recommendation needs more than the word "titanium." Send the following information so machine and consumable options can be screened before sample testing:
- Titanium grade, heat treatment, and current surface condition
- Part drawing, dimensions, weight, wall thickness, and clear photos
- Burr or defect location, starting roughness, and target surface
- Protected edges, threads, holes, sealing faces, and cosmetic areas
- Permitted dimensional change and inspection method
- Required parts per hour or per shift and acceptable reject rate
- Downstream cleaning, coating, anodizing, assembly, or regulatory requirements
Frequently asked questions
Why do titanium parts come out of the tumbler darker instead of brighter?
A darker result after tumbling usually means the surface oxidised rather than refined. Titanium has low thermal conductivity, so heat from the media contact stays at the surface and reacts with oxygen. A part that comes out darker will also anodise to a duller, less consistent colour later. The fix is less heat per unit time — lower energy input, shorter cycles, sufficient compound flow — not a longer cycle.
How do I remove burrs from thin-wall titanium tube without thinning the wall?
Thin-wall tube is the case where both mechanical cutting and aggressive abrasive media fail. A chamfer tool removes wall thickness along with the burr, and high-energy media deforms a thin wall before it cuts the burr. Mass finishing at low energy with fine media works on the burr edge while the wall is supported, and the acceptance criterion has to include wall thickness measured after the cycle, not only whether the burr is gone.
Can burnishing remove a titanium burr?
Only micro burrs. Burnishing moves material rather than removing it, so it can flatten a very small edge but cannot remove a burr of meaningful thickness. On titanium, running a burnishing cycle on an oversized burr causes overheating, work hardening and discoloration — the cycle makes the part worse. Deburr first, then burnish for appearance.
Why does titanium discolour so quickly during polishing?
Low thermal conductivity and a reactive surface. Heat generated at the contact point does not spread into the part, so a small area reaches a temperature the rest of the part never sees, and titanium oxidises readily when warm. The oxide that forms is what shows as a straw, bronze or blue tint. Reducing pressure and contact time matters more than reducing speed.
Can a burnishing cycle remove a brown oxide or anodic film without changing the surface?
No. The film sits in the surface layer, so removing it means removing material, and any mechanical action changes the polished surface. Where the part allows it, a controlled chemical or electrochemical strip can remove the film without mechanical action, but it has to be validated on the actual alloy and finish. Polishing over the film usually adds heat and deepens the tint.
What burr size can mass finishing realistically remove on titanium?
Only micro burrs — typically sharp edges in the hundredth-of-a-millimetre range. A mass-finishing cycle on a thicker burr does not remove it faster; it overheats the surface, work-hardens it and produces discoloration. If the burr is thicker, the route needs a cutting stage before the finishing stage, not a longer finishing cycle.
Does a longer cycle improve a titanium finish?
Not on its own, and often it makes things worse. Titanium keeps taking up oxygen while it is warm, so an extended cycle at the same energy adds heat exposure rather than refinement. Brightness comes from a finer finishing stage with controlled heat, not from extra time in the same stage.
Validate the Process with Your Actual Parts
Send your part photos, drawing, alloy, defect, finish target, protected features, and production quantity. Jintaijin can help define a sample-test route covering machine type, media, compound, cycle stages, separation, and inspection.
Request a Titanium Finishing TestFrequently asked questions
Why is titanium harder to polish than stainless steel?
Titanium is lighter and has lower thermal conductivity, so heat builds up at the contact point instead of dissipating. It also work-hardens, which means a process that presses rather than cuts can leave the surface harder than the base material and harder to finish in the next stage.
What causes scratches that appear after polishing?
Scratches that remain after the final stage usually come from an earlier stage. If the tool marks or the previous abrasive were deeper than the final stage can reach, no amount of extra final-stage time will remove them. The fix is a controlled intermediate stage.
How do you protect fine details on a titanium part?
Details are lost first at edges, slots and thin walls, because that is where media contact is concentrated. Smaller media and a shorter cycle reduce the loss, and the detail should be checked on a sample rather than assumed.
Can titanium parts be tumbled without distortion?
Yes, but thin sections are sensitive to mechanical load. Loading, media weight and cycle time are the variables that decide the outcome. Distortion is usually a load problem before it is a process problem.
What should be checked on the first parts out of a titanium cycle?
Check the finest features first: thread crests, slot edges, thin walls and any surface that has to stay dimensionally stable. Those show a problem before the flat surfaces do.
Answers are directions to test on a sample part, not validated results for a specific component.
 +86-592-2381506

 IPv6 network supported