As a technical engineer at JintaiJin, I’d like to share insights into the meticulous process we use to restore saxophone components to a bright, refined finish. The saxophone, with its intricate arrangement of brass parts and precise structure, requires specific techniques for effective rust removal and polishing. At our workshop, we utilize advanced polishing equipment to ensure a smooth, brilliant result.
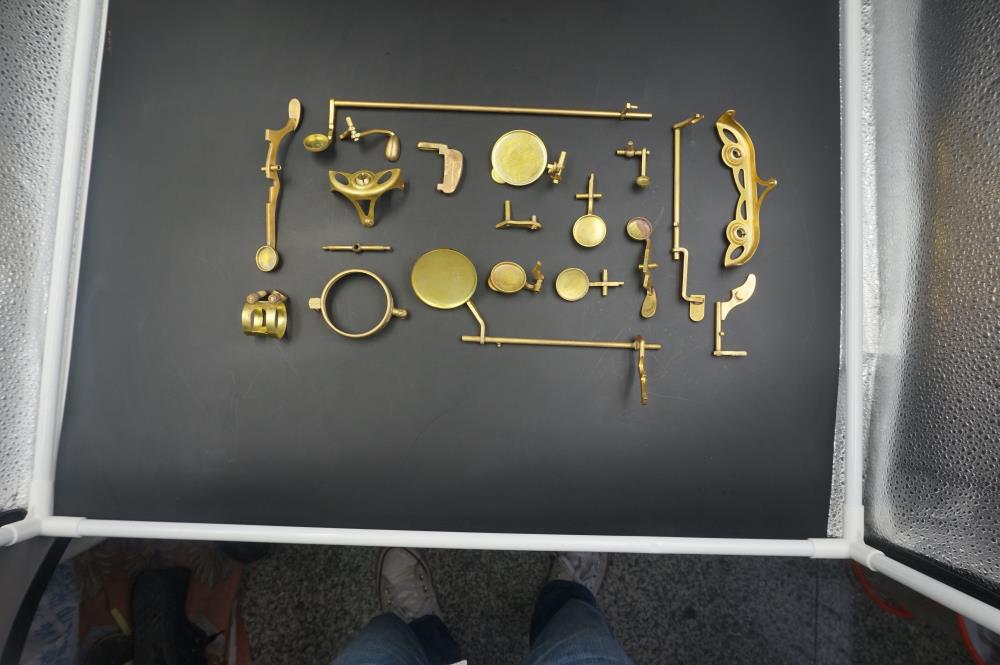
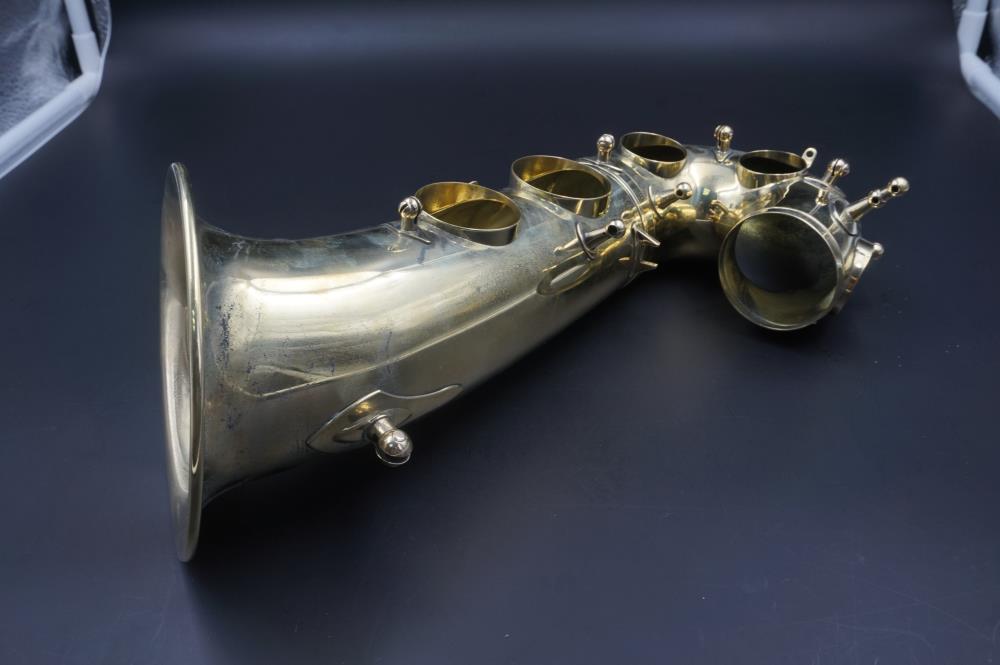
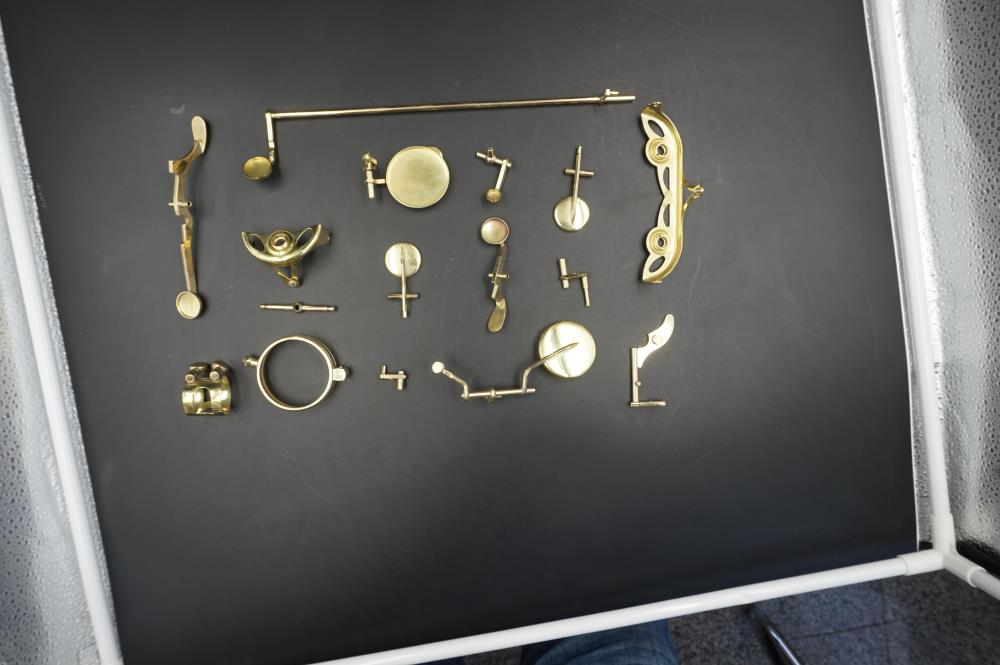
Before starting, we thoroughly inspect all saxophone components. This includes disassembling the saxophone into its various parts, such as keys, levers, rods, and the main body, as shown in the images above. Each part is examined for rust, tarnish, and surface impurities, allowing us to determine the degree of treatment required. The goal is to identify areas with severe oxidation or deep scratches that might require more intensive grinding.
Once disassembled, all parts undergo a pre-cleaning phase to remove grease, dirt, and loose particles. For this, we typically use an ultrasonic cleaner with a mild detergent solution. The ultrasonic waves help lift dirt from hard-to-reach areas, ensuring that all surfaces are free from contaminants before the main polishing process. After cleaning, each part is rinsed with distilled water and dried thoroughly to prevent new rust formation.
For parts that exhibit heavy rust, we start with coarse abrasive grinding. We use specialized abrasive wheels or grinding belts from our store, designed to remove the surface layer of oxidation without damaging the underlying brass. This coarse grind is crucial for parts with pitting, as it smooths the surface to prepare it for fine polishing.
Equipment Used: For this stage, we recommend a vibratory deburring machine or a belt sander with coarse-grit abrasive belts, available in our 'Products' section. The abrasive material should be suitable for brass to prevent any unnecessary wear on the saxophone parts.
Following coarse grinding, we move to a fine grinding stage, using a higher grit abrasive for a more delicate polish. This step focuses on reducing any scratches left from the previous phase and refining the overall surface. The objective here is to achieve a smooth base that will allow for a high gloss during the final polish.
Equipment Used: We switch to a finer abrasive wheel or sandpaper in the range of 600-800 grit. For small or intricate parts, we may use handheld rotary tools to access tight spaces, ensuring all parts are uniformly treated.
At this point, we use a polishing compound that is slightly abrasive to further refine the surface. This compound helps to remove micro-scratches left by the fine grinding stage and gives the brass a slight shine. The intermediate polish prepares the surface for the final high-gloss finish.
Equipment Used: We use a bench polisher with a felt or cotton polishing wheel, applying the compound lightly across each part. This process may require multiple rounds of polishing to achieve an even pre-polish on all components.
For the final step, we use a non-abrasive polishing compound to achieve a mirror-like finish. This stage is where the saxophone's brass parts get their professional shine, making them look as good as new. We carefully apply the polishing compound with a high-speed polisher, focusing on ensuring that the finish is consistent across all surfaces.
Equipment Used: A high-speed buffing wheel or rotary polisher, fitted with a soft polishing pad, is ideal for this step. We use premium polishing compounds specifically designed for brass, as listed in our store’s 'Products' section, to ensure a flawless shine.
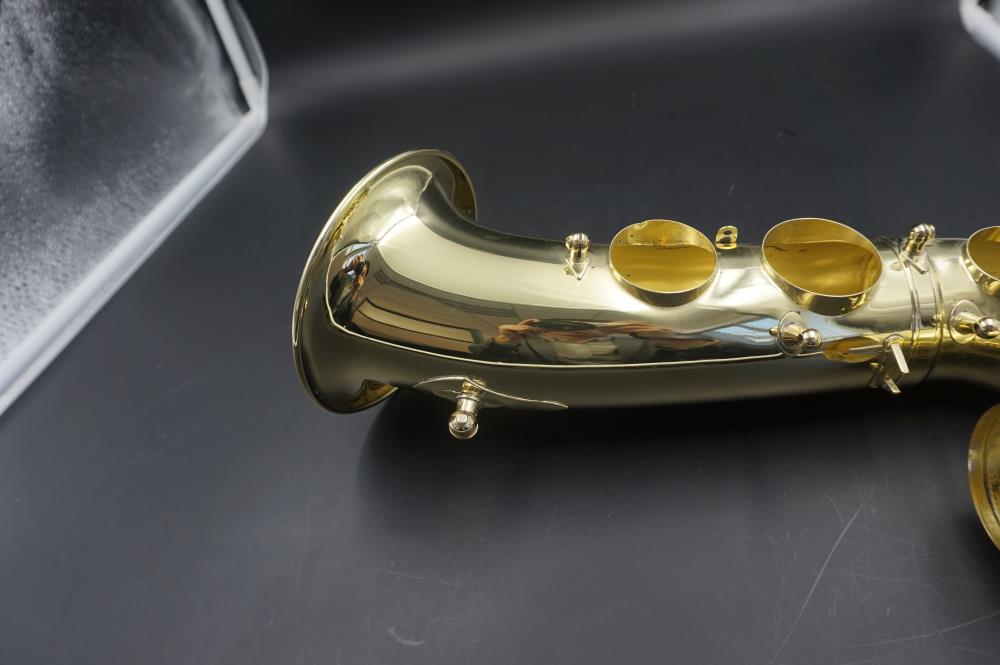
After polishing, each part is meticulously cleaned to remove any leftover polishing residues, ensuring there are no abrasive particles that could cause damage over time. We then reassemble the saxophone, carefully fitting each part back into place. Once assembled, we perform a final inspection to check for uniformity in the finish, smoothness in the action of keys, and overall aesthetic quality.
To preserve the polish and protect the saxophone from future oxidation, we recommend applying a clear lacquer or a thin layer of protective wax to the brass. This optional coating acts as a barrier against moisture, preventing tarnish and extending the life of the polished surface.
Equipment Used: A spray gun can be used for applying a lacquer finish, or a soft cloth can be used for wax application.
The process of rust removal and polishing for saxophones involves multiple stages, each requiring precision and care. By following these steps with the right equipment from our store, musicians and collectors alike can restore the shine and functionality of their saxophones. For a professional-quality finish, it’s essential to use specialized tools and compounds, as described, to bring out the natural beauty of brass.
For further details on each step or to inquire about specific equipment for saxophone polishing, feel free to visit our website's 'Products' section or contact us directly.
Email : info@surface-polish.com


 IPv6 network supported


 +86-592-2381506